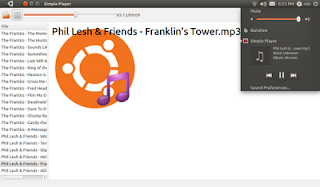
An important part of integrating with the Ubuntu desktop is ensuring that your application is using all of the appropriate indicators. In this entry, I explain how I added support for the Ubuntu Sound Menu to the sample application "Simple Player."
Ubuntu's Sound Menu allows users to access some of a media players functions without the user having to find the application window and use the applications controls. To add support for the Sound Menu controls, which allow the user to Play, Pause, and use Next, and Previous functions, takes 4 basic steps:
- Create a Desktop File so the Sound Menu knows that it should display your application.
- Add sound_menu.py to your application, instantiate a SoundMenuControls object, and start a dbus main loop.
- Implement functions from the SoundMenuControls so that the Sound Menu can control your application.
- Call functions on the SoundMenuControls objet so that the Sound Menu knows about changes that your applications makes.
If you are developing an application, and have not installed it, most likely you do not have a desktop file installed. Desktop files are used in Linux desktops to describe your application to the system. Many parts of the desktop refer to desktop files for things like creating application launchers and menus, file handling support, etc... The Ubuntu Sound Menu uses desktopfiles to determine which applications it should launch and handle. In a default Natty install, only Banshee will have a desktop file that the Sound Menu will detect and want to handle.
Desktop files all live in /usr/share/applications/. A quickly project has a file called app-name.desktop.in. This file will be turned into a real desktop file by the packaging and installation system. But it won't work for development, so you'll want to create a new one and copy it into /usr/share/applications/.
For simple-player, I created a desktop file with the following contents:
[Desktop Entry]
Name=Simple Player
Comment=SimplePlayer application
Categories=GNOME;Audio;Music;Player;AudioVideo;
Exec=simple-player
Icon=simple-player
Terminal=false
Type=Application
MimeType=application/x-ogg;application/ogg;audio/x-vorbis+ogg;audio/x-scpls;audio/x-mp3;audio/x-mpeg;audio/mpeg;audio/x-mpegurl;audio/x-flac;
$sudo cp simple-player.desktop /usr/share/applications/
to copy it into the applications directory where the Sound Menu could find it. Then I logged out and logged in again so that the Sound Menu could discover it.
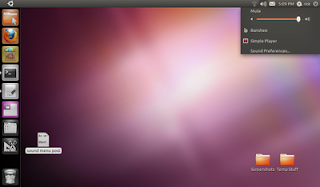
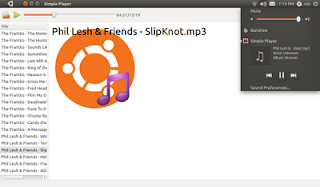
Now Simple Player shows up as an option in the Sound Menu!
Get sound_menu.py
The Sound Menu communicates with applications via the MPRIS2 DBUS API. This was a good choice by the Sound Menu developers because many applications already support MPRIS2. However, doing DBUS programming, especially with Python, can be a tad complex. Since I didn't want application programmers to have to rewrite all the DBUS code every time someone wants to integrate a Python application with the Sound Menu, I create a module called sound_menu.py to encapsulate all the DBUS goo. Note that sound_menu.py does not implement all of the MPRIS2 specification, only the parts that the Sound Menu needs.
To get sound_menu.py, it's probably easiest to check it out from launchpad account:
$bzr branch lp:~rick-rickspencer3/+junk/sound_menu
This will create a directory called sound_menu, with a single file sound_menu.py. If you want to, you can look at sound_menu.py and copy and paste the code into your program to make it work. However, sound_menu.py is designed so that you can easily mix it into your application without having to modify it, or work with the DBUS calls directly. We'll go that route for Simple Player.
So the first step is to copy the sound_menu.py file into the library for Simple Player. For example:
$cp sound_menu/sound_menu.py simple-player/simple_player/
Setting Up sound_menu in Your Code
Now that the sound_menu module is copied into the applications library, there are a few steps to take before you can really start programming it.
First, you need to import the SoundMenuControls class from the sound_menu module. I did this in the simple-player file with the other simple_player imports, right above the class deceleration section. So I added the bottom line:
from simple_player import (BaseSimplePlayerWindow)
import simple_player.helpers as helpers
from simple_player.preferences import preferences
from simple_player.sound_menu import SoundMenuControls
  #turn on the dbus mainloop
  from dbus.mainloop.glib import DBusGMainLoop
  DBusGMainLoop(set_as_default=True)
if __name__ == "__main__":
  # Support for command line options.  See helpers.py to add more.
  helpers.parse_options()

  #turn on the dbus mainloop
  from dbus.mainloop.glib import DBusGMainLoop
  DBusGMainLoop(set_as_default=True)

  # Run the application.
  preferences.db_connect()
  preferences.load()
  window = SimplePlayerWindow()
  window.show()
  gtk.main()
  preferences.save()
Create an Instance of SoundMenuControls
Now that we've done the booking keeping to import the SoundMenuControls class, and also to start a DBUS loop, it's possible to intantiate a SoundMenuControls object. To create a SoundMenuControls object, you need to tell it the name of the desktop file to look for. So, I added this line to the bottom of the finish_initializing function in simple-player:
self.sound_menu_controls = SoundMenuControls('simple-player')
Using "$quickly run" to start simple-player, notice that the Sound Menu now knows that it is running, and presents the Controls for it.
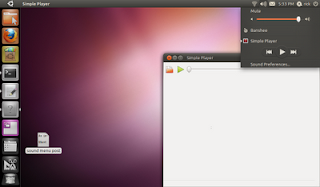
If you click on the different buttons and such, though, you'll notice that sadly they don't work. Well, why would they? The Sound Menu doesn't know how to make Simple Player do what it wants. In order to do that, we need to implement a few functions, and tell the SoundMenuControls object to use those functions. Then we'll need to add a little bit of code to inform the Sound Menu when changes occur in Simple Player too.
All of the functions that you need to implement start with "_sound_menu_*". I named them this way so that it was obvious what the functions were for, and also so that they weren't likely to conflict with any code that you already wrote.
There are 2 different approaches that you can take to implement SoundMenuControls's functionality in your application. You can inherit from it, typically by using multiple inheritance, or you can assign functions to the _sound_menu_* functions. This later method, though while not quite as clean, is a bit easier, so I went with that.
The first thing I did was create local implementations of the necessary functions. Note that I could have named them whatever I wanted, but I decided to just stick with the names from SoundMenuControls. There are 6 functions that must be implemented. I added te following functions directly below the finish_initializing function. I think between the names and the comments, they are pretty self-explanatory, so I won't cover each one.
      def _sound_menu_is_playing(self):
          """return True if the player is currently playing, otherwise, False"""
          return self.player.playbin.get_state()[1] == gst.STATE_PLAYING

      def _sound_menu_play(self):
          """start playing if ready"""
          if len(self.ui.scrolledwindow1.get_children()[0].selected_rows) > 0:
              self.player.play()

      def _sound_menu_pause(self):
          """pause if playing"""
          if self.player.playbin.get_state()[1] == gst.STATE_PLAYING:
              self.player.pause()

      def _sound_menu_next(self):
          """go to the next song in the list"""
          self.play_next_file(self, None)

      def _sound_menu_previous(self):
          """go to the previous song in the list"""
          self.play_previous_file()

      def _sound_menu_raise(self):
         """raise the window to the top of the z-order"""
         self.get_window().show()
Note that the functions are actually quite simple. They provide a mapping from the actions that a user takes in a sound menu, to the functions in the simple-player file. Now I just need to tell my SoundMenuControls object to use those functions instead of the ones that it comes with. I do this by simply assignment, directly after the line where I created the object:
          self.sound_menu = SoundMenuControls("simple-player")
          self.sound_menu._sound_menu_next = self._sound_menu_next
          self.sound_menu._sound_menu_previous = self._sound_menu_previous
          self.sound_menu._sound_menu_is_playing = self._sound_menu_is_playing
          self.sound_menu._sound_menu_play = self._sound_menu_play
          self.sound_menu._sound_menu_pause = self._sound_menu_pause
          self.sound_menu._sound_menu_raise = self._sound_menu_raise
  def play_previous_file(self):
     #get a reference to the current grid
     grid = self.ui.scrolledwindow1.get_children()[0]

     #get a gtk selection object from that grid
     selection = grid.get_selection()

     #get the selected row, and just return if none are selected
     model, rows = selection.get_selected_rows()
     if len(rows) == 0:
         return

     #calculate the next row to be selected by finding
     #the last selected row in the list of selected rows
     #and decrementing by 1
     prev_to_select = rows[-1][0] -1

     #if this is not the last row in the last
     #unselect all rows, select the next row, and call the
     #play_file handle, passing in the now selected row
     if prev_to_select != 0:
          selection.unselect_all()
          selection.select_path(prev_to_select)
          self.play_file(self,grid.selected_rows)
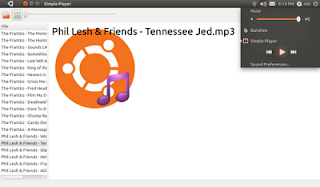
            self.sound_menu.song_changed(title = selected_rows[-1]["File"])
          self.sound_menu.signal_playing()
Now the Play/Pause button works, and the song title stays in sync as we make changes. But it's still possible for Simple Player and the Sound Menu to get out of sync. If I pause the song in Simple Player, and then use the Sound Menu, notice that the Sound Menu still thinks the song is playing because Simple Player never told the Sound Menu that the user paused it.
You may recall when building Simple Player that it was easy to get access the controls for the MediaPlayerBox. So, to finish off the integration, we'll connect to the signal handler for that button, and then tell the Sound Menu when it's been used.
First, connect to the "toggled" signal for the play button. I added this line to the end of the finish_initializing function:
self.player.play_button.connect("toggled",self.play_button_toggled)
  def play_button_toggled(self, widget, data=None):
      if widget.get_active():
          self.sound_menu.signal_playing()
      else:
          self.sound_menu.signal_paused()
New in Natty, the Sound Menu also includes support for playlists. I'm planning to add SoundMenuPlaylists as another class i the sound_menu module. In this way, applicatins such as Simple Player that don't have playlists can just implement the controls part. But other applications could implement the Playlist functionality.
