Friday, December 30, 2011

In Vino JQuery, not a Socratic, dialogs

I spent a bit of today adding the capability to Veratas to collect user input in the form of a "dialog". I put "dialog" in quotes, because I used a JQuery dialog within the HTML, rather than a Gtk dialog window.

Before settling on JQuery for this project, I looked at it and YUI in some depth. I was attracted to YUI because it seems very very complete. In fact, it has a filterable and sortable data grid, which is very important to me, as most applications, when you get down to it, are really just CRUD apps.

However, I went with JQuery for Veritas because the samples and tutorials made it seem very easy to get things done, and Veritas has simple needs.

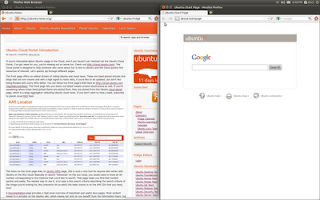
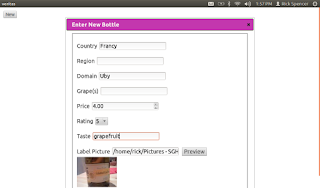
JQuery has a cool page where you can create just the javascript that you need, as well as a theme generator. Note the "grapey" dialog bar in the screenshot, I set that color in the theme generator.

What the Dialog Does
First thing was to lay out the dialog in the normal HTML way. Note that I set it to be display:none, by default.

  <div id="dialog" title="Enter New Bottle" style="display:none;width=00px">
<fieldset>
<p>
<label for="country">Country</label>
<input type="text" name="country" id="country" value="" placeholder="">
</p>
<p>
<label for="region">Region</label>
<input type="text" name="region" id="region" value="" placeholder="">
</p>
<p>
<label for="domain">Domain</label>
<input type="text" name="domain" id="domain" value="" placeholder="">
</p>
<p>
<label for="grapes">Grape(s)</label>
<input type="text" name="grapes" id="grapes" value="" placeholder="">
</p>
<p>
<label for="price">Price</label>
<input type="number" name="price" id="price" value="" placeholder="$">
</p>
<p>
<label for="rating">Rating</label>
<select name="rating" id="rating" value="" placeholder="">
<option value="1">1</option>
<option value="2">2</option>
<option value="3">3</option>
<option value="4">4</option>
<option value="5">5</option>
<option value="6">6</option>
<option value="7">7</option>
<option value="8">8</option>
<option value="9">9</option>
<option value="10">10</option>
</select>
</p>
<p>
<label for="taste">Taste</label>
<input type="text" name="taste" id="taste" value="" placeholder="">
</p>
<p>
<label for="image">Label Picture</label>
<input type="text" name="image" id="image" value="" placeholder="">
<button id="preview_button">Preview</button>
<img id="preview_image" src=""/>
</p>
<p>
<button id="submit_new">OK</button>
</P>
</fieldset>
</div>

Then, I created a "New" button, and wired it up to some code that I was able to get from the excellent JQuery demo pages to display the dialog. Note that the documentation made it really easy to copy and paste my way to success here, including figuring out how to choose different reveal effects and such.

        $( "#dialog" ).dialog({
autoOpen: false,
width: 600,
show: "blind",
hide: "blind"
});
$( "#new_button" ).click(function() {
$( "#dialog" ).dialog( "open" );
return false;
});
The dialog includes a submit button. I wired this up to create a JSON object and send a signal with all this data to the backend using the "send_message" javascript function.
        $( "#submit_new" ).click(function() {
bottle = {"country": + $( "#country" ).val(),
"region": $( "#region" ).val(),
"domain": $( "#domain" ).val(),
"grapes": $( "#grapes" ).val(),
"price": $( "#price" ).val(),
"rating": $( "#rating" ).val(),
"taste": $( "#taste" ).val(),
"image": $( "#image" ).val()};
send_message("new_wine", bottle);
$( "#dialog" ).dialog( "close" );
return false;
});

Yesterday, send_signal took 2 strings: the name of the signal and some other data. Today I changed it to take the name of the signal, and any javascript object. The function uses a popular JSON parcer to stringify the javascript object before using the "set title hack" to pass the data tot he back end.
function send_message(signal_name, data)
{
title = document.getElementsByTagName("title")[0];
message = {"signal": signal_name,"data":data};
title.innerHTML = JSON.stringify(message);
}
Now that I have written that part, I don't have to worry about formatting my data, I can just pass it over.

Similarly, on the back end, I made the HTMLWindow class decode the json and pass it along:

def _on_html_message(self, view, frame, title):
if title != "null":
try:
message = json.loads(title)
except Exception, inst:
print inst
message = {"signal":"error","data":"signal not parsed"}
else:
message = None
self.on_html_message(message["signal"],message["data"])

def on_html_message(self,message):
pass

As a result, subclasses like VeritasWidnow can just use the data without worrying about the implementation. It doesn't do anything with the data yet.

2 Way Communication
I did add one bit of round tripping. It turns out that as a security precaution, the "file" input type does not let the javascript see the full path selected, it only allows the selected file to be uploaded to the server. I hope that I can figure out how to let the user grant Veritas permissions to pass the selected file to the javascript, but I can hack around it if it doesn't turn out to be easy or possible.

Meantime, I let the user type in a full path to the file, and then click "Preview". This takes the entered string, and sends it to the back end.

$( "#preview_button" ).click(function() {
send_message("image_preview", $( "#image" ).val() );
return false;
});


The back end then uses the awesome PIL libary to make a thumbnail, and then passes the path of the thumbnail back. I actully suspect that I will be able to skip the step of saving the file and just use the string data, possible with the Canvas element.


def on_html_message(self, signal_name, data):
if signal_name == "image_preview":
try:
img = Image.open(data)
img.thumbnail((128,128), Image.ANTIALIAS)
path = """/home/rick/.tmp/thumbnail.jpg"""
img.save(path,"JPEG")
path = "file://" + path
self.view.execute_script("receive_signal('set_preview','" + path + "');")
except Exception, inst:
print inst.message
self.view.execute_script("""receive_signal('set_preview_error','Could not find a valid image at %s');""" % data)
Debugging HTML/javascript
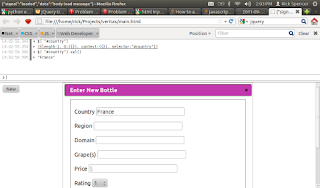
Another handy think I found today is that I can load the HTML page into Firefox, and use a web console to poke at it. Very handy. Of course, this works now because I am not doing string replacement, but I think that I can actually make a similar thing work with a WebKit window.
Next
So now that I can collect the info from the user, I'll start saving the data in a sqlite database, and then work on presenting the data to the user.

Thursday, December 29, 2011

In Vino Veritas and HTML5 Client Apps


So, basically, not to put to fine a point on it, I've started to write apps for Ubuntu in a different way, essentially, replacing Gtk (or really PyGtk) with HTML5. This is my first post about how am I doing it. I've just started a project called "Veritas" which will be a wine tasting database for my wife and I. We'll be able to enter information about each bottle that we drink, and then look at trends over time, perhaps helping us pick nicer and nicer bottles as we go.

First, though, what happened, I thought you got along great with Gtk?
Well, I do still have a soft spot in my heart for pygtk. Believe me, I've written plenty of code in it. I know the ins and outs pretty well, and I'm able to do things with it like write a response UI that doesn't block to much during run longing processes and such. PyGtk is great for building "boxy" apps, but I think a lot of people want to build slicker apps than Gtk is really designed for, or at least design them in different ways thatn Gtk supports well.

Why not Qt and QML?
This app, in fact, would be well suited for a QML app. However, I have other apps in mind, and I found QML/Qt to not be quite up to the job. For instance, I want to write a communication app to combine OpenLDAP and IRC functionality. Currently, there are no Qt libraries for LDAP or IRC, so to write such an app with QML, I'd have to write C++ Qt code to wrap whatever C libraries, and then write code to export models from that C++ code to expose it the right way in QML. That is a lot of overhead, especially considering that there are good Python libraries for LDAP, IRC, and pretty much anything desired. So, I designed myself a system that let me stick with Python for the back end code.

Also, QML lacks a widget toolkit at the moment, so there would be a lot of manual coding of things like buttons and such.

Why HTML5?
I chose HTML 5 for the widget toolkit for a few reasons.
  • I already know HTML/CSS/Javascript pretty well, and I know that cool things can be done with it. I bet a lot you all know it pretty well too.
  • Webkit is very well supported Open Source used and maintained by many large companies.
  • There are lots of cool widget toolkits to choose from, I'm currently looking at YUI since I think it's in pretty heavy use by some of the web teams at Canonical.
  • Because I wanted to try out HTML for client programming.
My Application Architecture
First, I laid everything out total flat to start with. This is because I wanted to come to grips with making the view code talk to the model/controller code without mucking with any extra complexity. Of course, I will need to modify the layout as the actual code grows.

Currently, I am only focused on makinga client application programming system, though I may, in the future, extend the system so the model/controller back end could be on a server, and the view available via a browser. But this is firmly out of scope right now. I am, however, trying to be cognizant of making the system essentially portable by sequestering the Gtk specific code into specific files that can be replaced if I want to run it without Gtk at some point.

Therefore, there are some important differences to note if you are used to web programming.
  • The back and and view code communicate via signals to each other. This is much different than web programming, where the view makes a request and waits for the server to respond with a string (for Ajax apps) or redirects to another view passing some state along with it.
  • This means that the back end can send signals to the view. The view does not need to pole to see if the back end is ready, for example, the back end can just send a signal when it is.
  • This also means that long running processes can block the GUI, since they are running in the same thread. I shall most likely put the Gtk main loop in it's own thread so I can run run-longing processes in seperate threads, and then communicate between them.
  • The view cannot call a function on the back end, and wait for a response (for example with XmlHttpRequest). Rather it can only send the back end a signal.
  • The back end is not stateless. This is greatly simplifying. Most web programming frameworks have a lot of code to maintain state by storing it and accessing it on future requests by reading cookies stored on the client.
  • Currently, I have nothing like server side tags that are the bread and butter of most web programming frameworks. This typically works via string replacement, so I could either find a library to add this functionality, or make it easier to do string replacement with the HTML. This is typically desirable for a web app since you want to configure the HTML before it is sent from the server. Less important in a client app, but still, some string replacement of HTML may save some effort in writing complex javascript against the browser DOM.
Ok, let's get to the good stuff. To bin file is called "veritas". Running this file creates a VeritasWindow and then starts the Gtk main loop. The Gtk main loop is there because the Webkit window has to run inside something, and I chose a Gtk Window for this because of the simple integration with Ubuntu.

A VeritasWindow only does 2 things so far. It tells it's baseclass "HTMLWindow" what html file to load, and it listens for signals from that view. Later, it will create new HTML5 Windows and do other stuff in response to signals from the HTML view.

HTMLWindow is meant to be used only as a base class. First, it creates a top level menu so you can quit the app, and also, I think that apps should have menus (I haven't really thought through how menus will work in this system yet, but I'm hoping that DBUS Menu helps me out). Then it loads the HTML that the subclass told it to load. It also listens for signals from the view, parses the signals and has what is essentially a virtual function called "on_html_message" for subclasses to override. You should be able to receive messages from the view without looking at the internals of how it works. Among other things, this is platform specific.

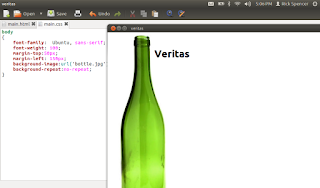
main.html is the HTML5 code for the main window. All it does now is send a signal that it is loaded, and you can see that I added a heading. When paired with main.css the layout and look and feel of the UI will be controlled completely in the view code.

helpers.js is a file that I think I may need to handle platform specific signals sent to the view. Of course, you can always call "execute_script" and send whatever you want from the backend, but I think it's cleaner to expect well formatted signals from the back end instead.

Conclusion
So, that's basically all the boiler plate for making an HTML5 client app for Ubuntu. This represents a few hours of work on my part to make a re-usable and extensible system.
My next steps will be to do some database programming with sqlite, then I'll probably build a data input window for it. This certainly calls to mind Rails-like thinking (hmmm, I have the model, why can't I generate the view from that on the fly?), but, I don't think I want anything that complex. After I finish Veritas, I'll then extract the base classes and such, and perhaps create a Quickly template, then go ahead and work on my certain to be more complex communication application.

Monday, November 28, 2011

Smoke Tests

The QA team has started a page for getting up the minute automated results from smoke testing of daily images. Check it out! They still have more smoke tests to set up, but everything is running automatically from daily builds. You can check to see if the latest build installs and if basic tests run. If they do, it's probably worth testing with that build. If it's not, then the team should be busy at work at making it work testing!

Also, this page is just on small step in the blueprint for smoke tests results page.

Friday, November 18, 2011

12.04 Quality Initiatives Update

It's been 2 weeks since UDS. We left UDS with a lot of big plans about developing 12.04 in a precise way. So, in 2 weeks, we've gotten a good start. Here's a slapdash update before I leave for the weekend.

+1 Maintenance and Daily Quality
For the last week, we've had an installable and usable image every day! Colin is keeping a wiki until we have a proper dashboard set up.

Upstream Testing
A lot has gone on in this area. The QA team spent this week getting a QA lab set up, so we have a place to run automated tests. The Desktop team is working with the Dx team to get automated compiz testing set up, hopefully as early as next week. I need to circle back with other upstream projects, especially the ones that Ubuntu Engineering make, to check on their progress.

Distro Acceptance Testing
Didier Roche has started documenting tests to be run before uploads of Unity and working with the QA team to figure out how best to track them. You can check out his progress here.

QA Lab
Like, I said, the QA team has been working on the QA lab. We have trunk tests and distro acceptance tests to run. We need hardware! Here's a shot that Pete Graner took of the new rack for Open Stack testing:
Lots going on to make a 12.04 in a precise way! You can see the QA team's current work items here.

Tuesday, November 8, 2011

Some Rock Solid things are Quite Beautiful

I mentioned at the closing session of UDS last week, that it was remarkable UDS due to the amount of time spent discussing how we build Ubuntu, not just what we will build. As a community, we have blazed many new trails in software development and delivery, and I feel strongly that we are standing at a nexus where we will be able to collect the wisdom of the past seven years of developing an Open Source Community Distro and apply that wisdom in the future in a way that introduces a step function in our adoption curve as we pursue our goal of a mainstream free desktop.

Most of these "how should we build it" discussions circled around building and maintaining development velocity in 12.04 so that we could add new features that users need while maintaining and delivering the quality they also need. Fortunately, we laid some ground work in the 11.10 cycle. Pete Graner led the QA team in 11.10. Along with some new QA staff, they instituted some important practices, like automatically testing the daily ISO each day, and they set up a QA lab for running tests automatically, along with reporting of those test results.

Acceptance Criteria
How we assess and accept code from upsreams within Canonical was an area ripe for discussion. We arrived at UDS with a strong view about how we should be doing this, and we had three discussions about it at UDS. Jason Warner this area of collective effort "Acceptance Criteria". Please note that for 12.04 and the foreseeable future, this applies ONLY to code developed by Canonical, or was call them "Canonical upstreams". There are two main goals of this effort:
  • Ensure that landing code from Canonical upstreams does not introduce issues that make the development release too hard to use and develop on, thus slowing down velocity for everyone.
  • Encourage Canonical upstreams to fix bugs throughout the cycle, and not to wait until after Feature Freeze to focus all efforts on bug fixing.
As a result, we should see faster development, and a higher quality final product.

Acceptance Criteria means that upstreams have some responsibilities, and Ubuntu has some responsibilities. For upstreams, it boils down to "treat your trunk as sacred". Practically, it requires:
  • There is a trunk of code bound for Ubuntu.
  • This trunk always builds automatically.
  • This trunk has tests that are always passing automatically.
  • All branches are properly reviewed for having both good tests and good implementation before merged into trunk.
  • Any branch that breaks trunk by causing automated tests to fail or causes trunk to stop building, are immediately reverted.
For Ubuntu Engineering, the responsibilities include:
  • Every maintainer in Ubuntu must have a test plan for upstream trunks that are run before uploading to the development release.
  • Tests in the test plan that are automated can be run with the help of the QA team.
  • Tests in the test plan that are manual can be run with the help of the community team, (and the community QA Lead that is to be hired)
  • Refrain from uploading a trunk into Ubuntu if there are serious bugs found in testing that will slow down people using the development release for testing and development.
  • Revert uploads that break Ubuntu, as there is no point in having the latest of a trunk in Ubuntu if it's broken and just slowing everyone down.
  • Add tests to upstream projects for the Ubuntu test plan if serious bugs do get through that cause a revert.
ISO integration testing
Every day the QA team automatically runs tests on the ISO produced that day, if any. This was set up in 11.10. For 12.04, we will expand on this effort substantially. First, by growing the body of tests run. Secondly, by automatically reporting on the quality of the ISO each day. Finally, by responding to the results of the tests immediately, see the next section.

Daily Quality
We will strive to ensure that we have a new daily ISO each day. If the QA team finds an ISO to be "untestable" or failing critical tests that will hamper development velocity that day, we will respond by trying to fix the issues. For issues that cannot be foreseeably fixed within 3 hours, we will typically back out those changes. After the issue is addressed by being fixed or backed out, we *will spin another ISO*. We will collect metrics on what percentage of days we have a working and testable ISO.

Pre-archive Testing
Of course, catching problems in ISO testing and fixing them everyday is nice, but stopping the problems from reaching Ubuntu in the first place is even better. With that end in mind, Evan Dandrea ran a very interesting session about testing library and other changes before uploading them to the archive for the development release.

This will start out simple. The QA team will be able to install the latest ISO in their test environment, then pull an updated package from a PPA. A tool that I lovingly named "tool 2" will be created that will use rdepends to find packages that both depend on the newly upagraded package and also have tests worth running. Tool 2 will then run those tests and report the results. In this way, issues with libraries and other transitions can be fixed before they get into the development release and slow everyone down.

The next step, which I sincerely hope we get to during 12.04 development is to make tool 1. Tool 1 takes the output of tool 2, and judges if it should copy the newly updated package, or some set of packages, into the release archive. If we get tool 2 set up, then uploads to the development release would first go into the proposed archive for the development release, tested there, and only added to the release archive when found to be "ok" by the tests.

+1 Maintenance Team
Colin Watson is leading an experiment for 12.04 development. He will be leading a small staff of rotating engineers who are focused soley on the stability of the development release. We plan to learn from this effort, and see if we should repeat it, tweak it, or drop it for future versions. In any case, these efforts are meant to enhance, not replace, the generally diffused responsibilities for quality of the ISO and the archive. Colin led a good UDS session on the topic. The priorities defined there being:
  1. Deal with ISO smoke test issues, includes install images being buildable
  2. Upgrades through development releases work day to day, look at conflict checker
  3. All packages in main are installable
  4. All packages in main are buildable
  5. Component-mismatches / MIRs / etc.
  6. Finishing library/NBS transitions through archive (beyond main)
  7. All packages in the archive are buildable
Summary
All in all, these are a lot of structural changes to how we approach building Ubuntu and ensuring the quality of it. Here is a table to highlight some of the key changes.


Practice 11.10 12.04
Canonical upstream automated tests prevelant in some projects, not others all projects will have automated tests
Canonical upstream automated builds prevelant in some projets, not others all projects will ahve automated tests
Canonical upstream branch reviews all projects all projects
Canonical upstreams reverting branches that "break" trunk occurs in some projects, not others, not always
all projects will revert branches that break trunk
testing of Canonical upstream code before uploading to development release not common or systematic all Canonical upstream projects will have a test plan that is executed before each upload
reverting Canonical upstream code from the development release development release waits for an upload with "fixes" uploads that slow velocity for others are backed out
Daily ISO testing Limited test coverage, test failures not immediately responded to more test coverage, fix issues and respin within the same day
Daily ISO Can go for days or longer wihtout a working daily A broken daily ISO becomes the #1 priority for whoever broke it
Pre-archive testing "Call for testing", not totally systematic, no way to know what tests were run Add ability to run tests for rdpends before release, potentially test in proposed for the development release
Archive Maintenance Responibility diffused throughout team Responibility diffused throughout team, complimented by a small dedicated crew

Sunday, October 23, 2011

Stealthy, An App to Pause Desktop Logging


Here's a quick preview of an app I'm working on. It's called "Stealthy" because it provides a kind of "Stealth" mode by pausing Zeitgeist from logging while it's running. The upshot is that when you see the indocator, your activities during that time won't show up in Unity. Quitting Stealthy starts the logging again.

It's also got a "Delete History" function, that just clears all Zeitgeist and GNOME most recently used history, giving you a clean slate.

Here's a video demo:


D'oh ... I just realized I searched for the wrong things to demonstrate that Delete History command worked. Anyway, trust me, it would have looked like it worked if I searched for the right thing! :)

You can try it by running from the branch( bzr branch lp:~rick-rickspencer3/+junk/stealthy ). However, I plan to add a little ninja icon instead of the stock inidcator icon, and also a warning dialog for the Delete History function. Then I'll put it in my PPA, and also probably sell it in the Software Center for the minimum price.

Thursday, August 25, 2011

Using PyGame in a PyGtk App

I've written a few games in pygame, but never quite finished them. Generally because the complexity of adding user interactivity for things outside the essential game play. While pygame is a sweet sprite library, it has no widget toolkit, so things like collection a string from the user, having menus, etc... are all incredibly tedious to program. Adding something like a high score screen is as much effort as game programming itself.

Pygtk, however, has a rich widget toolkit, but it's hard to use it from within a pygame app. This is difficult in part because Gtk needs a gtk.main loop, but a typical pygame app is using it's own loop with clock.tick(). As a result, there are threads locking each other out, and generally craziness ensues.

But, it turns out, you can embed a pygame surface within a pygtk app, and it's actually pretty easy. So you can use just the one gtk.main loop, all interupt programming, access to the whole Gtk toolkit, and also all the easy loading of images, playing of sounds, collision detection, and other sprite functionality of pygame. It's really the best of all possible worlds.

I wrote a minimal demo script to show how to do this. The "game" is just a single sprite that you can move with the keyboard. You can see the screen in the screenshot at the top of this post that there is a gtk menu being activated!

I didn't intend this to be a tutorail on pygame, but rather integrating pygame in pygtk, so all the "game" does is let you move a sprite around.

It's probably easiest to look at the whole script, but let me point out some of the steps involved. I'll assume that you've already set up a gtk.Window with your menus and such. So, the first step is to set up a gtk.DrawingArea that will become the pygame surface. It's normal code to add it to your window:
      da = gtk.DrawingArea()

da.set_size_request(300,300)
da.show()
vbox.pack_end(da)
da.connect("realize",self._realized)

This last line, connecting to the realize signal, is important. It's important because you use the gtk.gdk.window.id to associate the drawing area with pygame. The drawing area's window won't have an id until it's been rendered by gtk. So the then in the handler for the realize event, we set up the association with the drawing area, and also start actually drawing the game:


def _realized(self, widget, data=None):
os.putenv('SDL_WINDOWID', str(widget.window.xid))
pygame.init()
pygame.display.set_mode((300, 300), 0, 0)
self.screen = pygame.display.get_surface()
gobject.timeout_add(200, self.draw)
The first three lines essentially set up the drawing area as the pygame surface. The fourth line creates a global object for a pygame.screen object that will be used in the draw function. Finally, the draw function gets caslled every 200 milliseconds via a gobject timeout. This is as much easier way of setting up the game loop than the normal pygtk way of blocking the clock for a certain number of ticks, as gobject.timeout_add plays nicely with the gtk.main loop.

In a real game, you'd probably put an "update" function on the timeout to do things like check for collisions, random events, and etc... (You'd also probably use a much smaller time out period than 200 milliseconds). However, our game only has one sprite, and it doesn't do anything but move so we don't need that functionality. But how do we tell it move? In pygame, every time through the main loop you pull all the events off the event stack. With pygtk, you use signals to handle the input when it occurs.

To do this, in the __init__ function for the window, we set up our pygame objects, and then connect to the key-press signal:
      #set up the pygame objects

self.image = pygame.image.load("sprite.png")
self.background = pygame.image.load("background.png")
self.x = 150
self.y = 150

#collect key press events
self.connect("key-press-event", self.key_pressed)

Then in the signal handler, we manipulate those objects. Typically, you'd be storing the x and y coordinates in a sprite object, but since there is only one sprite to track in this "game" we can handle it more simply. So in the key_press handler, we just detect if an arrow key was pressed, and we adjust the game data appropriately:


def key_pressed(self, widget, event, data=None):
if event.keyval == 65361:
self.x -= 5
elif event.keyval == 65362:
self.y -= 5
elif event.keyval == 65363:
self.x += 5
elif event.keyval == 65364:
self.y += 5
Then, every 200 milliseconds, the timeout comes buy and tells pygame to draw everything using normal pygame functions:


def draw(self):
self.screen.blit(self.background,[0,0])
rect = self.image.get_rect()
rect.x = self.x
rect.y = self.y
self.screen.blit(self.image, rect)
pygame.display.flip()

return True
Since pygame is getting update in gobject timeout and normal Gtk signal handlers, and not in it's own gameloop, gtk.main is free to run and handle menus, and even display dialogs:

Tuesday, August 23, 2011

A Photobomb Sale!


Photobomb showed up in the Software Center yesterday. As I prepare a space in my garage for the Rolls Royce I intend to buy from the proceeds, I took a moment to check in on sales, and, in fact, someone bought it! The MyApps portal has a really nice overview screen for managing multiple apps for sale.

Now, I strongly suspect that a friend bought it to make me feel better, but still, it gave me a chance to check out the nice graphs that myapps makes for developers. Of course, I expect Photobomb sales to stress test their math and charting capabilities due to an overwhelming crush of sales, but it's nice to see what they are shooting for.


I'm really impressed with the work that Canonical ISD has done here. I'd love to see this work made available to people who want to land non-commercial apps on a stable release of Ubuntu soon. Currently, it only supports commercial apps.

Speaking of which, while I am selling Photobomb, please keep in mind that it is still Free. That means that anyone who buys it gets all the software freedoms (it is GPL3, afterall). Furthermore, if you don't want to buy it, you can get Photobomb for free my PPA. Seriously, it you want to use it, but don't want to buy it, no worries, running it from my PPA is no problem for me.

Wednesday, August 17, 2011

Cha-ching!


So, today I uploaded a special version of Photobomb to my PPA. It's special because I consider this my first *complete* release. There are some things that I would like to be better in it. For example:
  • I wish you could drag into from the desktop or other apps.
  • I wish that the app didn't block the UI when you click on the Gwibber tab when Gwibber isn't working.
  • I wish the local files view had a watch on the current directory so that it refreshed automatically.
  • I wish inking was smoother.
  • I wish you could choose the size of the image that you are making.
  • I wish that you could multi-select in it.
But alas, if I wait until it has everything and no bugs, I'll never release.

So, I am releasing Photobomb in my PPA. It is a free app. You can use it for free, and it's Free software. So, enjoy.

However, I am *also* releasing it commercially into the software center. That means that you can choose to install from my PPA for free, or you can buy it from the Software Center. I guess the only real difference will be that I could break it in my PPA, and I won't generally plan to provide lots of support, but if you bought it, I'd feel a bit more like I should strive to fix your bugs and stuff.

The code is GPL v3, so people can enhance it, or generally do whatever they think is useful for them (including giving it a way, or using it to make money).

I found it remarkably easy to submit photobomb to the Software Center. I just used the myapps.ubuntu portal, and it all went very smoothly. Really just a matter of filling in some forms. Of course, since I used Quickly to build Photobomb, Quickly took care of the packaging for me, so that simplified it loads.

I'll keep everyone posted on how it goes!

Saturday, August 6, 2011

The End of an Era?

Today I committed and pushed a change to Photobomb to remove functionality! The web tab used to allow users to search the web for images. So you could search for "cat" and get the most popular kitteh pix ready to mix into our images. No longer. You can still plug in a web address, and Photobomb will it's best to find an image there, but no more web searches.

A couple of weeks ago, Google retired the Google API I was using, so I switched to Yahoo!, only to find that the Yahoo! one got retired a week or so ago.

Both services switched to newer APIs. The thing is, both Google and Yahoo! now charge an application for using those APIs. Yup, I would have to pay actual money to use the services.

I really don't have a problem with them doing that. I mean, someone has to pay to keep those services running. And I suppose if I charged a bit for Photobomb, I could use that to fund paying for the services. However, at the moment, I don't really feel like dealing with setting up an account and dealing with all that, in addition to recoding to the new APIs.

So, I guess the era of the web giants competing to get me to use their "free" services has drawn to a close. I suppose it's a bit like a bursting bubble. Goodbye free web-services :/

Monday, August 1, 2011

Coding Copy and Paste Functionality

Copy and Paste Features
A well designed application should probably support Copy and Paste. While it sounds simple, it actually entails a few features.

Copying from Your Application to Other Applications
This means that your application should offer up data formats that other applications can read. So a user should be able to copy in your application, and paste into another one. This may entail converting your internal data format into a new one that other programs will expect.

Copying from Other Applications into Your Application
This means reading other applications data formats and converting it your applications internal representation.

Copying and Pasting within Your Application or between Instances of Your Application
This entails marshaling all the data that your application needs. If a user can run multiple instances of your Application, it won't be sufficient to simply copy an instance of an object, since one instance won't have access to what is in the memory of another instances.

How Does Copy and Paste Work?
You start out by accessing the desktop's clipboard. Then, you tell that clipboard what kind of data your app can put on the clipboard, and then what kind of data your app can take off of the clipboard. Then, you right some functions to handle the following situations:

If the user selects a Copy command in your application, you tell the clipboard that data is available (but you don't actually put the data on the clipboard until the user selects paste).
If the user selects Paste in your application, you ask the clipboard for the data, and the application with the data then supplies it to the clipboard. Sometimes the application supplying the data is your application, and sometimes it is a different application.
If the user selects Paste in a different application, then the clipboard might ask your application to supply the data.

Set Up Variables
So, let's get to the code. First thing, we need to create a reference to desktop's clipboard, and also create a variable to store a reference to whatever item may be copied.
     self.clipboard = gtk.Clipboard()
self.clipboard_item = None
I put this in finish_initializing.

Handling the Copy Command
Then I wrote a function called "copy_menu" which is called when the user selects "Copy" fromt he menu. the first thing this function does is tells the clipboard what kinds of data is supported by passing in a list of tuples. Each tuple has a string that specifies the type, info regarding drag and drop, and a number that you can make up to specify what the type again. For Photobomb, only the strings are important. You need to use types that are commonly understood on the Linux desktop so that apps know that you can give them data they care about. I chose "UTF8_STRING" for putting strings on the clipboard, and the mime type "image/png" for images. For example, Gedit recongizes UTF8_STRING, and Gimp recognizes image/png, so Photobomb can copy data into both of those apps. Only Photobomb recognizes "PhotobombItem", of course. These strings are called "targets" in Gtk.

After specifying what data types you will support, you then tell the clipboard about those data types, along with what function to call if the user tries to paste, and what function to call when the clipboard gets cleared. Finally, the function stores a reference to the currently selected item. It's important to store this reference seperately, as the selection could change before the user pastes.
   def copy_menu(self, widget, data=None):
paste_data = [("UTF8_STRING", 0, 0),
("image/png", 0, 1),
("PhotobombItem", 0, 2)]
self.clipboard.set_with_data(paste_data, self.format_for_clipboard, clipboard_cleared)
self.clipboard_item = self.selected_item
Handling Programs Pasting from Photobomb
After telling the clipboard what kind of data you can put on it, the user may try to actually Paste! If this happens, you have to figure out what kind of data they are asking for, and then put the correct kind of data onto the clipboard. To figure out what is being asked for, you check the target. This info is stored in the selectiondata argument, that gets passed in.

Putting Text on the Clipboard
When an application is asking for a string, life is really simple. Every PhotobombItem has a text property, so it's simple to simply set the text of the clipboard with this data.
   def format_for_clipboard(self, clipboard, selectiondata, info, data=None):
if selectiondata.get_target() == "UTF8_STRING":
self.clipboard.set_text(self.clipboard_item.text)
Putting an Image on the Clipboard
But what about when the app has asked to paste an image? The clipboard only supports text, so you can't paste an image, right? Actually, the contents of any binary stream or file can be converted to text, and that text can be put on the clipboard. However, you don't want to simply set the text for the clipboard, as binary data can have characters in it that will confuse a program that thinks it's a normal string. For example, when you read in a file of binary data, you can set that to a string in Python, but other programs not written in Python will probably get have errors if they try to treat it as a string type.

In fact, the clipboard will reject text that is binary data. So, if you have binary data, you need to:
  1. convert it into text
  2. set the selectiondata with the proper target
Photobomb has a function called "image_for_item" that returns image data as binary text, so Phothobomb can just call that function and put the resulting text into the selection data. The "8" in the second parameter tells the selectiondata object essentially boils down to text.
     if selectiondata.get_target() == "image/png":
selectiondata.set("image/png", 8, self.image_for_item(self.clipboard_item))

Putting a PhotobombItem on the Clipboard
If an instance of Photobomb wants to paste, we need to provide enough information to create a proper PhotobombItem. A PhotobombItem knows a lot about itself, for example, it's clipping path, it's rotation, it's scale, etc... When copyng and pasting within Photobbomb or between instances of Photobomb, we don't want to lose all of that data.

So how do we paste a PhotobombItem if we can only put text on the clipboard? Python has built in support for turning objects into strings. This is called "pickling". So, in the simplest case, we could just convert the Python object to a string, put that string onto the clipboard, and then when convert it from the string back to a Python object.

So, first, import the pickle module:
import pickle

Then you can use "dumps" to dump the object to string:
   if selectiondata.get_target() == "PhotobombItem":
s = pickle.dumps(self.clipboard_item)
self.clipboard.set_text(s)
Sadly, this doesn't work for Photobomb because the GooCanvas classes that PhotobombItems derive from don't support pickling. So we can't do this in the simple way. However, what we *can* do, is create a dictionary with enough information to create identical PhotobombItems, and then pickle that dictionary. For photobomb, this gets a bit annoying complex and is not relevant to the blog posting, so I snipped out most of the code. You can always look at the full code on launchpad, of course.

This is, unfortunately, a lot more involved. However, it works just fine:
   if selectiondata.get_target() == "PhotobombItem":
d = {"type":type(self.clipboard_item)}
d["clip"] = self.clipboard_item._clip_path
#snipped out all the other properties that need to be addeed to the dicitonary
s = pickle.dumps(d)
self.clipboard.set_text(s)
You don't have to use pickling. For example, you could represent this dictionary in JSON instead. However, pickling is the native serialization formatting for Python, so it's easiest to use it when you can.

Now Photobomb can support copying and pasting into text editors, like Gedit, and image editors, such as the Gimp, as well as into Photobomb itself.

Handling Pasting in Photobomb
The essential paste function is run when the Photobomb user uses Photobomb's Paste command. This function tries to figure out if there are any interesting data types on the clipboard, and then uses them. Typically, such a function should ask for the richest and most intersting data it can handle first, and then less rich data types in order. For Photobomb, the richest data is a PhotobombItem, or course. Then an image, and then finally text. You may have noticed above that when a user pastes from a clipboard, it runs a function in some application. There is no gauruntee that these functions will be fast. For this reason, it's best to use the asyncronous "request" methods on the clipboard.

So, the paste function simply tries to figure out which is the best data type to paste, if any, and then asks the clipboard to call the correct function when the data is ready.

 def paste_menu(self, widget, data=None):
targets = self.clipboard.wait_for_targets()
if "PhotobombItem" in targets:
self.clipboard.request_contents("PhotobombItem", self.paste_photobomb_item)
return
for t in targets:
if t.lower().find("image") &gt; -1:
self.clipboard.request_image(self.paste_image)
return
for t in targets:
if t.lower().find("string") &gt; -1 or t.lower().find("text") &gt; -1:
self.clipboard.request_text(self.paste_text)
return

In the cases where another applications has put an image or text onto the clipboard, it's easy to use functions already built into Photobomb to paste those data types. Notice that the return functions already have all the data ready in the form of text or the pixbuf.

   def paste_text(self, clipboard, text, data=None):
self.add_new_text(text)
def paste_image(self, clipboard, pixbuf, data=None):
self.add_image_from_pixbuf(self, pixbuf)
When an instance of Photobomb has put the data on the clipboard, it's a bit more complex, because Photobomb has to de-serialize the dictionary, and then create the proper item. Again, I snipped out most of the code for using the de-serialized dictionary, because it just unnecessarily complicated the sample:

   def paste_photobomb_item(self, clipboard, selectiondata, data=None):
item_dict = pickle.loads(clipboard.wait_for_text())
if item_dict["type"] is PhotobombPath:
new_item = PhotobombPath(self.__goo_canvas,
item_dict["path"],
item_dict["width"], None)
#snip out all the code to handle all of the other properties
new_item.set_clip_path(item_dict["clip"])
new_item.translate(10,10)
new_item.set_property("parent", self.__root)
self.z_order.append(new_item)
self.add_undo(new_item, None)
Persisting the Clipboard Item
You may have noticed that an item isn't actually put on the clipboard until the user tries to paste. This is a great optimization, because pasting complex or big things can take a lot of time, and there is no point on the user waiting for a copy command to finish if they are never going to actually paste with it. However, what if the user selects "Copy" in your app, and then quits your app? How is the item going to get pasted?

Gtk handles this by letting you "store" data on the clipboard. This can actually be used at any time in your application, but to handle this particular situation, Photobomb just includes a few lines in it's on_destroy function. This causes the desktop's clipboard to store all of the data types, so all the functions for servicing a paste command get called, and the desktop's clipboard holds onto the data as long as it needs.

   def on_destroy(self, widget, data=None):
"""on_destroy - called when the PhotobombWindow is close. """
#clean up code for saving application state should be added here
paste_data = [("UTF8_STRING", 0, 0),
("image/png", 0, 1),
("PhotobombItem", 0, 2)]
self.clipboard.set_can_store(paste_data)
self.clipboard.store()
gtk.main_quit()

Saturday, June 18, 2011

Coding an Undo/Redo Stack


The other night I put (what I think are) the finishing touches of an Undo/Redo stack for Photobomb. This is the second time I've written an Undo/Redo stack, the first time being for the TextEditor Quidget. Neither time was I able to find much guidance for how to approach the problem. I handled it slightly differently each time. I thought I'd write up a blog post about how I approached Undo/Redo for Photobomb, in case it helps someone else out.

Generally, the way I conceived the problem was to keep a list of actions that needed to be undone. When an action is undone, then that action needs to be added to a list of actions that can be redone. But what does it mean to store an action in code? I thought of 2 approaches:
  1. Keep a list of actions as functions along arguments to pass to those functions.
  2. Keep a list of "backups" for every change made to an object, and on redo swap out the backup for the actual object.
List of Actions Approach
I took the first approach back when I wrote TextEditor. It was easy to do because the only actions supported by Undo and Redo was that something could be added to the TextBuffer, or something could have been removed. So I very literally stored a list of functions and elements. So on a change, such as when text has been inserted, I store point at which the text was inserted, along with the inserted text:
     cmd = {"action":"delete","offset":iter.get_offset(),"text":text}
self._add_undo(cmd)

The _add_undo function merely ensures that the list does not grow beyond a defined maximum, and adds it to the undo list:
   def _add_undo(self, cmd):
if self.undo_max is not None and len(self.undos) >= self.undo_max:
del(self.undos[0])
self.undos.append(cmd)
The heart of the __add_undo command was to extract the command to undo, and pass it along to _do_action(), and then add the return value of undo to redo stack.
     undo = self.undos[-1]
redo = self._do_action(undo)
self.redos.append(redo)
del(self.undos[-1])
do_action, in turn read the type of action, did the specified action, and returned the opposite action so it could be used for redo.
     if action["action"] == "delete":
self.get_buffer().delete(start_iter, end_iter)
action["action"] = "insert"
elif action["action"] == "insert":
self.get_buffer().insert(start_iter, action["text"])
action["action"] = "delete"
return action
So by keeping a mapping of actions and their opposites, and by using a dictionary to store the information needed to undo or redo the action, this system worked well for simple case of simple text editor.

List of Backup Approach
Not surprisingly, when I approach this problem in Photobomb, I followed the same basic solution path. For example, I set up a list to store undo actions in. I then started storing a code for actions like I used for delete and insert in the text editor. However, I quickly ran into some problems. Photobomb is more complex then TextEditor, and GooCanvas is more complex than TextView/TextBuffer. For example, storing all the info needed for undoing and redoing a clipping path on an object required some more complex code than seemed right for the problem. So, I switched to the second approach.

Here, I store a list of undos, but what I store in the list is objects. A "new" object, as in the object after the change, and the "old" object. Kind of like the backup.

To store an undo in this system, I make a back up of the object, change it, and then add the undo:
       saved_item = self.back_up_item()
self.selected_item.move(delta_x,delta_y)
self.add_undo(self.selected_item, saved_item)
Making the backup entailed duplicating the entailed not just making a copy, but removing the copy from the goocanvas, and storing the z-order. GooCanvas doesn't track z-order for you, so I had to track it myself. Every object on the GooCanvas suface derives from a subclass of the custom PhotobombItem and one of the built in GooCanvas types, such as goocanvas.Image). PhotobombItems have a duplicate function witch return a copy, and a remove function. So getting a copy was easy.
   def back_up_item(self, item=None):
if item is None:
item = self.selected_item
copy = item.duplicate(True, False)
copy.remove()
index = self.z_order.index(item)
self.z_order.insert(index+1,copy)
return copy
I quickly found that it is insufficient to simply store a pair of old and new objects for each undo. This is because an object can be modified twice in a row. And if you store the object itself, rather than a copy of the object, the undo stack will reference the object in whatever is it's current state, so undo can appear to weirdly go backward.

For example if I make an item, call it O1 bigger, I'll store a copy of O1, call the copy O1.1, and O1 as the old and new items, respectively. Then if I make it bigger again, I store another copy of O1, call it O1.2, and O1 *again*. So undoing will go O1 is replaced by O1.2, which looks right, but then undo again and O1 will be replaced by O1.1. But oops, O1 was already replaced, so O1.1 appears, but O1.2 was never replaced.

To guard against this, I looked backward through the undo stack to see where in the current undo stack the object appears last, and I take the current backup of the "old_item" and make that the "new_item" for the previous undo. So, for then making something bigger would store O1.1 and O1 again, but then making it bigger again, it would replace O1 with O1.2 as the "new_item" and then store O1.2 and O1 as the new_item at the top of the undo stack. So undo would replace O1 with O1.2, and then O1.2 with O1.1, and everything seems to work.

That was a pretty long winded explanation for not that much code. Basically, I loop back through the undo stack and update the last occurrence of the object being added with the copy before going ahead and adding the objects to the stack.
   def add_undo(self, new_item, old_item):
#ensure proper undos for multiple edits of the same object
if len(self.undos) > 0:
for item in self.undos[::-1]:
if item["new_item"] is new_item:
item["new_item"] = old_item
break
self.undos.append({"new_item":new_item,
"old_item":old_item})
self.redos = []
Note that I also reset the redo stack whenever the undo stack is modified.

So what does undo and redo do? They function in a very similar manner to the undo/redo functions in the text editor. First, they get they item from the top of the stack and stick it on the other stack. So for undo:
     undo = self.undos[-1]
self.redos.append(undo)
del(self.undos[-1])
Then they remove the new item, and restore the backup (assuming they both exist). If there is no backup, that means the item was just created, so removing the item is sufficient. Conversely, if there is no new item, then it means the item was deleted, so adding it back to the canvas is sufficient. Finally, the function has to position the new item in the z-order and then select the new item.
     if undo["new_item"] is not None:
undo["new_item"].remove()
if undo["old_item"] is not None:
undo["old_item"].set_property("parent",self.__root)
next_item = self._find_item_above(undo["old_item"])
if next_item is not None:
#position in z-order
undo["old_item"].lower(next_item)
self.selected_item = undo["old_item"]
self.__reset_selection()
Redo does essentially the same thing, only removes old_items and restores new_items. There was about 100% code duplication between the undo and redo functions. However, I decided to keep the duplicate code in place because I was worried that if I have to go back and fix bugs in a year or so, I'd need the code to be crystal clear about what it did. I can always refactor into a common function later, but for now, I felt that the duplicated code was just easier to read and understand.

Now, calling these functions is easy in cases where a menu item was used to change on object, as there was one and only one change to store in the undo stack. But sometimes it's not so easy. For example, Photobomb has what I call "Press and Hold Buttons". To make an item bigger, for example, you can use the Bigger menu item, or you can hold down the Bigger button until the selected object is the size that you want and release the button. The button emits a signal called "tick" every 100 milliseconds, which is bound to an action, in the case, the "self.bigger" function. This causes the item to get bigger many many times (about 10 times per second, in fact) but the user is going to think of it as one action to be undone.

In order to handle this case, I created two signal handlers, one for the press event and one for the released signal of a button. All the Press and Hold buttons use these handlers. The press signal handler creates an immediate copy of the item, and then connects the tick and the released signals. Occasionally, the released handler gets called twice, which causes some confusion, so I track the tick signal to make sure that the released signal is only handled once.
   def pah_button_pressed(self, button, action):
old_item = self.back_up_item()
tick_signal_id = button.connect("tick",action)
button.connect("released",self.pah_button_released, (tick_signal_id, old_item))
Then in the released signal, I add the new item and the old_item to the undo stack, assuming it hasn't been already.
   def pah_button_released(self, button, args):
tick_signal_id, old_item = args
#work around released signals being called multiple times
if tick_signal_id in self.__disconnected_tick_signals:
return
self.__disconnected_tick_signals.append(tick_signal_id)
button.disconnect(tick_signal_id)
if self.selected_item is not None:
self.add_undo(self.selected_item, old_item)
Now only 1 undo is added when a Press and Hold Button is used.

Another challenge to overcome in this system was handling the user changing selection by clicking on an item versus when the user clicked and dragged an item. The latter should be added to the undo stack, but not the former.

Fortunately, this can be handled with a similar pattern. The mouse_down signal handler creates a copy of the item, and passes it to the mouse_up signal handler.
           old_item = self.back_up_item(clicked_item)
self.__mouse_up_handler = self.__goo_canvas.connect("button_release_event",self.drag_stop, old_item)
Then the drag_stop function checks if the item was actually moved before adding to the undo stack. If the item hasn't been moved, then the selection has simply changed.

Finishing Touch
One last finishing touch is to ensure that the undo and redo menu items are only sensitive if there is anything in the undo and/or redo stacks. Photobomb handles this by connecting to the activate signal of the edit menu, and then checking if there is anything in the undo and redo lists, and setting the sensitivity accordingly.
   def edit_menu_reveal(self, widget, data=None):
active_undos = len(self.undos) > 0
active_redos = len(self.redos) > 0
self.builder.get_object("menuitem_undo").set_sensitive(active_undos)
self.builder.get_object("menuitem_redo").set_sensitive(active_redos)

There is a lot of ineractivity in photobomb, and this creates a bit of complexity in handling undo/redo. You can see all the code in context in the photobomb trunk.

Tuesday, April 19, 2011

My Effort at Writing Help for Unity


I told the kind folks in #ubuntu-doc that I'd give it go, writing up some documentation for Unity. Here's a first draft of my best effort. I'm hopeful that the real pros at this can mine this material for making nice official documentation. I'm hoping that thay can cut and paste from here into their docs, or at least can edit the content to something they like, but maybe get going a little faster since there is something to change, rather than having to start fresh.

I don't believe myself to be a particularly good writer, but, here without further a do ...

Overview

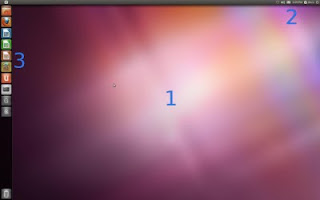
The Unity environment has four areas that, combined, allow full operation of Ubuntu.
These areas are:
  1. The Application Area. This is the main area of the screen for applications and documents.
  2. Indicators. Indicators run along the panel at the top of the screen, off to the right Indicators are persistent widgets that are always available for reference and Controlling Ubuntu. Indicators include functionality for things like networking, power, messaging, time, and managing a session.
  3. The Launcher. This provides access to favorite applications and running applications.
  4. The Dash (not shown). The Dash provides very fast access to applications and files via searching or browsing. The Dash can also be customized with new "lenses" to allow other types of searching.

How to Activate Applications via the Launcher


If the icon for the desired application is on the launcher, you can simply click on the icon, and it will launch the application. If the application is already running, clicking on the icon will activate the running application and bring it to the front. For example, if you click the Firefox icon on the launcher, this will launch Firefox, unless a Firefox window is already open, in which case Firefox will be brought to the front.

After launching an application, The Launcher, my "autohide" by sliding off the screen to the left. If this happens, it can be easily accessed by pointing the mouse all the way to the of the screen and waiting for the launcher to appear, or pointing to the top left corner of a screen will cause the launcher to appear instantly.

Running applications will have one tickmark to the left of the icon for each Window that is open. In this way, it is possible to see how many windows are open for an application.

Clicking on an icon with the middle mouse button will open a new window for a running application. Some applications also support open a new window via a "Quick List". Right clicking on an icon will reveal the Quick List for the application. For example, Firefox has a "Open New Window" option in the Firefox Quick List.

The Launcher can also be used via the keyboard, without the mouse. In order to activate an icon on The Launcher, press and hold the meta key on the keyboard (for example, on computers that came with Windows installed, there may be a Windows logo to mark the meta key). Pressing and holding the meta key will cause The Launcher to open, and each icon on The Launcher will be marked with a number or letter.

Clicking the keyboard key with the number or letter that corresponds to the desired icon while still holding down the meta key will activate that icon. Holding down the shift key as well while doing so will launch another instance of the application, similar in function to middle clicking with the mouse.

How to Activate Applications from the Dash


The Dash is activated by clicking on the Ubuntu logo in the top left of the screen, or by tapping on the meta key. When The Dash is activated in this way, it defaults to the Global Search lens. Commonly used applications and application categories are available by default.
The Global Search lens searches files as well as applications, so files can be quickly accessed in the same manner.

To quickly activate an application, typing the first few letters of an application will show the application's icon, which can then be clicked to activate. Alternatively, typing the Enter key on the keyboard will cause the first item in the list to be activated. In this way, an application can be run very quickly by tapping the meta key, typing the first few letters of the applications name, and pressing Enter.
The More Apps icon allows browsing of all installed applications. This view can also be activated by the Applications Lens icon on The Launcher. Applications are grouped into three categories, most frequently used, all installed applications, and applications that are available to be installed via Software Center. Note that if

Any of these section can be expanded by clicking the "See more results" link. For example, clicking "See more results" on installed applications will show all installed applications.
To limit the displayed applications to a category of applications, a category can be selected via the category selection dropdown.
The Quick List for the Application Lens allowss fast access to an application category.
Choosing one, will open The Dash and disply the selected category.


Adding an Application to The Launcher


An application can be added to the launcher by dragging the application's icon from The Dash onto the launcher. Alternatively, when an application is running, the Keep in Launcher item in the application's Quick List will permamently add the application to The Launcher.

Once on The Laucher, an icon's position on The Launcher can be changed by dragging it first off of The Launcher, and then back onto it in the desired location.

Finding and Opening Files


Files can be quickly searched and opened from The Dash. The Dash is activated by clicking on the Ubuntu logo in the top left of the screen, or by tapping on the meta key. When The Dash is activated in this way, it defaults to the Global Search lens. Commonly used applications and application categories are available by default.

The Global Search lens searches applications as well as files, so applications can be quickly accessed in the same manner.

To quickly open a file, typing the first few letters of the file name will show the file's icon, which can then be clicked to open. Alternatively, the icons can be navigated with the arrow keys, and typing the Enter key on the keyboard to open the selected file.


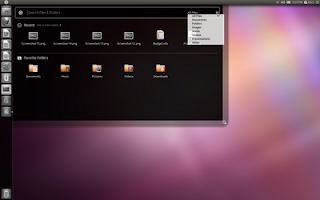
The Files and Folders Lens supports browing for files. The Files and Folders Lens can be activated via the Find Files icon in the Global Lens, or by clicking on the Files and Folders Lens icon on The Launcher. This lens presents recently used files, and commonly used folders.


Any of these views can be expaned using the "See more results link".

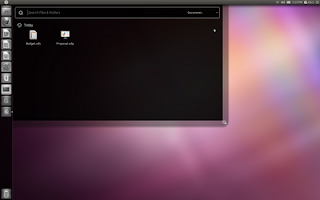
Searching file title and contents is supported in the search field, producing a list of results if any matching files are found.


The Files and Folders Lens also supports browsing for files by type, by choosing a type of file from the file type dropdown.


Selecting a file type will produce a list of files ordered by time.


While a file type is selected, search results will be limited to that file type.

The Quick List for the Files and Folders Lens icon on The Launcher allows fast navigation to a file type filter in The Dash.


Running Applications in Unity


With a few exceptions (notably Libre Office) menus for an active application window will be availble on the long top panel of Unity, in the Menu Indicator. When the menus are not active, the window title will be display there.


To see the menus that are available, simply hover your mouse over or near the window title, and the menus will be revealed, and you can then click on them.


Alteranatively, pressing the Alt key will also review the menu for the active window, along with any available keyboard accelerators.


Running applications will have one tickmark to the left of the icon for each Window that is open. In this way, it is possible to see how many windows are open for an application. Clicking on the application's icon in The Launcher will bring the application to the foreground.


Clicking on an icon with the middle mouse button will open a new window for a running application. Some applications also support open a new window via a "Quick List". Right clicking on an icon will reveal the Quick List for the application. For example, Firefox has a "Open New Window" option in it's Quick List.


Managing Windows


Switching Between Active Windows


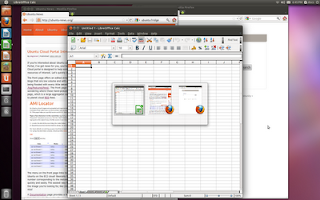
Ubuntu offers many methods for managing and switching between mulitple windows. The fastest way to switch between a window on top, and a window directly below it to hold down the Alt key, and quickly pres the Tab key. This will cause the top window to switch places with the second window. Quickly tapping Alt and Tab again will switch them back. Two windows can be alternated very quickly in this manner.

Alt and Tab can also be used to switch to a window that is not the second window. Pressing the Alt key and holding down the Tab key will quickly bring up a list of open windows. Pressing Tab will select each window in turn. Release Alt and Tab will cause the currently selected window to come to the front.


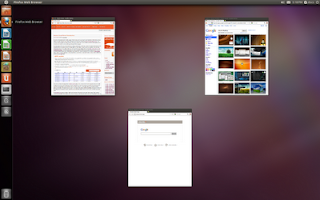
If there are mulitple windows open for a particular application, clicking on The Launcher icon for the desired application will reveal of all the windows. Clicking on the desired window will bring that window to the front.


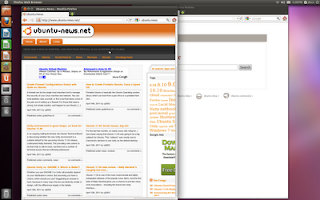
Pressing the Meta key and W will cause all open windows to be revealed, no matter the application with which they are associated. This faciliates quickly finding any application that is open, no matter the Workspace the window is on.

Window Size and Positioning


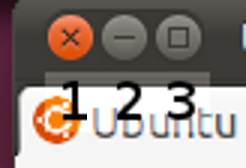
Document and application windows typically have the following three buttons for controling the size and visibility of the window:
  1. close
  2. minimize
  3. maximize


Clicking the close button will close the current window and potentially quit the application as well.

Minimize will hide the window altogether. A minimized window can be accessed by clicking on the application's icon in The Launcher, or by navigating to the window by holding down the Alt key and holding down the Tab key and then tapping the Tab key until the minimized window is selected.

A window that takes up the whole screen is "maximized". For an unmaximized application, clicking on the maximize button will cause the window to maximize. Clicking on the maximize button for a maximized will cause the window to unmaximize.
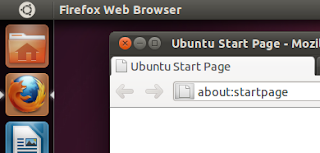
A window can also be toggled between maximized and unmaximized by double clicking on the applications titlebar.

Dragging an unmaximized window's title bar to the top of the screen will maximize the windw. Dragging a maximized windows title bar to the center of the screen will unmaximize it. Dragging a window by the titlebar to the the right or the left of the screen untl the mouse pointer touches the edge, will resize the window to take up half of the screen. This can be useful for sizing windows and using them side by side.

Workspaces

Workspaces provide a means for organizing windows into groups, and quickly switching between those groups. For example, windows associated with work could be grouped onto workspace 1 while windows associated with chatting with friends could be groupled onto workspace 2. By default, all applications are opened onto Workspace 1. There are four available workspaces.
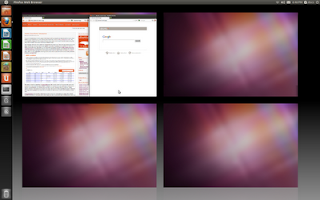
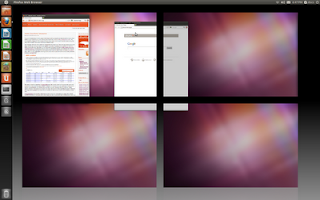
Clickng The Workspace Switcher on The Launcher provides an overview of the four workspaces, arranged in a grid.
Clicking on a workspace, and then clicking on The Workspace Switcher will make that workspace the active workspace. Applications launched from The Launcher or The Dash will be open on the active workspace.
Note that clicking on an icon in The Launcher for an active application, will navigate to that application. If the application is on a different workspace, that workspace will become active. A new window for an application can be open by middle clicking on the application's icon in The Launcher, or using the Quick List for some applications.
Holding down the Meta key and Clicking S is a short cut for activating The Workspace Swithcer. Holding down the Control and Alt keys, and clicking on the arrow keys very quickly navigates between workspaces.
Window can be moved between workspaces while the Workspace Switcher is active by simply dragging windows between the workspaces.

Settings


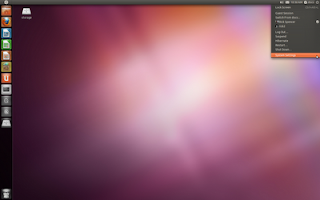
System Settings can be accessed via the Control Center dialog. To activate the Control Center, select System Settings from the Power Menu.
You can then choose the specific settings you are interested from the list.
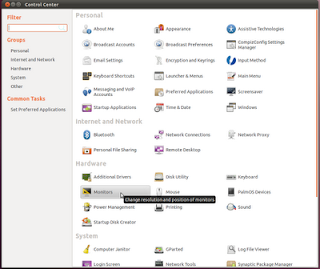
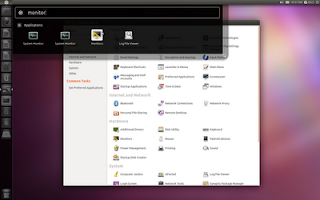
Alternatively, you can navigate directly to the settings that you are interested from The Dash.