Wednesday, June 5, 2013

The Social Phone

Yesterday I blogged about how psyched I was to have cellular data on my phone. Then I listed some things that the Ubuntu Touch needed to reach parity with my old Android phone, for me, personally. One of those missing things was a way to share images from my phone. But look! This actually works already. It turns out that there is a good start of social integration already started and working. 

Thanks to Bill Filler for walking me through the simple steps. Here's what to do if you want to get Twitter working.

Step 1: In your terminal, run the command $uoa-create twittter . So for me, I did "uoa-create twitter rickspencer3".(to get Facebook integration use $uoa-create facebook


Step 2: Wait for the Twitter auth web page to open. For some reason it is really tiny and you can't zoom it. The Facebook page is also tiny, but you can zoom it. However, be careful, the Facebook page requires you to click the commit button, which is way down on the bottom right. 

Step 3: Go to the Application lens. Search for the Friends app, and launch it.
Step 4: Glory in having your timeline on your phone!


Note that only Twitter and Facebook are integrated so far, more networks coming soon. Also note that you can't tweet pics from your gallery yet, but that is coming soon as well.

Of course, we can't rely on using a terminal to set up things like this. I'll be excited to see more social networks and a a GUI configurator land in the image.

Tuesday, June 4, 2013

Dog Fooding Success

Last week I was in Washington DC house hunting (successfully, I might add ;) ). Since I abandoned my Android phone for full time Ubuntu Touch phone, the lack of cellular data was painful, but not as painful as I thought it would be because there was wireless everywhere. However, there were a couple of times that I would have liked to have checked email and such when I wasn't around wireless. Also, I get lost easily, so not being able to check a map was a painful regression once or twice.

So, today, I was really happy to get the cellular data set up on my phone, and knock around Seattle a bit trying it out. It worked really well. It was interesting to see how so much of the slowness of my old phone was the phone itself, and not the cellular network speed as I had thought. I got a nice snappy experience on Ubuntu Touch.

In the image above, you can see that one needs to use the terminal to turn the cellular data connection on and off. I wish we had co-developed the GUI with the backend support. I would like us to start thinking more across the team, seeing if we can bring experiences out in full. That said, I know it was a huge amount of work to get data working, and having the back end working and keeping it working is certainly a solid way to develop. So, great job to the Phonedations team!

Having cellular data completes the "daily driver" goals we set! Never one to rest, now I am thinking about what would bring parity for my Ubuntu Touch phone in terms of the features that I actually used on my Android phone. The list is modest:

  1. My phone sometimes gets hot and then the batter runs down faster than it should. Would love to figure out what is going on there and get longer batter life.
  2. Getting pictures *off* my phone. I can take pictures, but can't share them yet.
  3. Loading up and watching videos. I like to take videos to the gym and on trips and watch them on my phone sometimes.
  4. Euchre. I know this is silly, but I have passed a lot of time playing this card game on my last phone. Maybe I can make my own implementation, but programming a card game seems like it would best be done with a framework, and it's not really up my ally.
I'm sure everyone has a different list like this, but I bet I am the only one with Euchre on their list. :)

Friday, May 24, 2013

all dogfood diet


Yesterday I walked to my local t-mobile store and had them cut my SIM down to "micro" size. I did this so I could fit it into my Nexus 4. I wanted to put it into my Nexus because I decided that it was ready for me to start using full time. I put my Galaxy II away. 

I decided to do this because as of yesterday I could:


  • Import my contacts
  • Make and receive SMSs
  • Make and receive phone calls
  • Use the internet via a wireless connection


It still lacks data over the cellular network. We won't get that until next week. So, I can't really say that it's dogfoodable for everyone as per our original goals, but we are close!

Friday, May 17, 2013

Dogfood Update


At the end of April, we set the goal to have Ubuntu Touch be dogfoodable on the Nexus and Nexus 4 phones. By that we mean, the goal is to make it so that we can use our phones exclusively as our phones. Today I chatted with some of the engineering managers involved to see how much progress we have made towards that. I am happy to say that it looks like we are still on track for this goal. However, there do appear to be some risky parts, so I am keeping my fingers crossed.


  • You can make and receive phone calls: Done!
  • You can make and receive sms messages: Done!
  • You can browse the web on 3g data: Tony had been blocked on some technical issues, but thinks he's through them, so is in the debugging phase. He expects to have this done by end of May as per the dogfooding goal. For me, personally, this is the only missing part for me to be able to use the phone as my main phone around town. So, if Tony cracks this nut, then I will put away my old phone and start using my Ubuntu Phone exclusively.
  • You can browse the web on wifi: Done! This has actually been done for quite a while.
  • You can switch between wifi and 3g data: There are 2 parts to this work. There is low level networking code to get done, and then there is UI to enable it. That means that the Phone Foundations team and the Desktop team both have work to do. Both teams expect to get it done for May, but the work is not started yet.
  • The proximity sensore dims the screen when you lift the phone to talk on it: There are two parts to this also. Gather the sensor data and then making the phone app use the sensor data. Work has not started for this part either.
  • You can import contacts from somewhere, and you can add and edit contacts: There is some work done on this that imports from a *.csv file. I expect there will be some crude support for this in time for the May goal. It might be fun for someone to try out a more elegant implementation. Ubuntu Phone is using Evolution Data Server for the contacts store, so there may be folks out there who already have the experience to do this easily.
  • When you update your phone your user data is retained, even if updating with phablet-flash: Done! This part being done makes the contacts import less important to me because as I add contacts they won't get blown away. On the other hand, it means it is worth it to import contacts, since you won't have to re-important as you update your phone each day (while it is in development).


Thursday, May 16, 2013

Feel Like Friday (post-vUDS)


It feels like Friday! Why? I think it's because I am tired. I am tired because Virtual UDS turns out to be surprisingly intense.

Power to People

So, that is to say, the second Virtual UDS is over. After experience my second vUDS, I think vUDS is really a boost for the transparency of the Ubuntu Project for a few reasons.

  • Frequency. We can do it every 3 months instead of every 6 months. As I mentioned in the opening plenary, this is important because we don't actually plan only every 6 months anymore. Like any modern software project, we are continuously planning. The 3 month cadence for vUDS means that there will be less time between detecting a need to change plans and discussion about how to make those necessary changes. I pushed very hard to have the first vUDS quickly, because there was a lot of planning for Ubuntu Touch that was backed up and needed proper discussion. If we waited until now, a lot of the work would have started without a good opportunity for discussion.
  • Access. Folks don't have to travel to wherever UDS is. People with specific interests can rock those interests with a laser focus, without having to dedicate a whole week away from home. Let's face it, traveling for 2 weeks a year to participate in UDS is something that only a few privileged people can swing. Many many more people can join a hangout.
  • Persistence. The sessions are streamed live, but then instantly available for reviewing, along with the white board, links to blueprints, etc... Try it. Go to Summit for the UDS that just ended. Find a session. Click on the session. It's like you are there live. Discussions that used to exist only in the memories of a select few with some written traces are now persisted and available.

Personal Faves

I won't go into a run down of the results, because that job is taken. However, here are some of my personal favorite discussions at this vUDS. These are my favorites based only on personal interests of mine. These are by no means the most important decisions or discussions. Just things that interest me a lot personally.

Rolling Release

After the unfortunate kerfufle last cycle when I pushed hard to move Ubuntu to a model of LTSs with rolling releases in between, it was niceto close in on one nice outcome. Namely, Colin has a technical solution that will allow users to subscribe to essentially the tip of development. Instead of using "raring" or "saucy" in your sources lists, you'll subscribe to a new name which is symlinked to whatever is the current development release. In this way, each day you will be on the latest. Even the day after a development release becomes a stable release, because the symlink will just point to the next development release.

I ended up with a couple of action items from this session. Mostly, to come up with a name and bring it to the next Tech Board meeting for approval. I'm very much leaning to "rolling", but I am open to discussion ;) This would mean you could say "I am on Raring", or "I am on Precise", or "I am on Rolling". "I am on Rolling" means that you are on the tip of development. Fun!

Touch Image Testing

I've been very keen to get Ubuntu Touch out of "preview" mode and into our standard development processes so that they inherit all of the daily quality tools that we have in place. This means moving all the code of out PPAs and into the real archives, so that we get the benefits of all the efforts we have put into place around -proposed and archive maintenance. It also means getting smoke testing and regression testing automated on the Touch images. I loved hearing from the Phone Foundations team and the QA team about their vision for "not accepting regressions". We should have dog-foodable touch images as early as the end of this month. Then if we can keep the images fully usable with minimal regressions each day, we will go very fast towards completion.

Ubuntu Status Stracker

I am partial to this topic because the status tracker started out as a labor of love for me. The first real bit of code that I wrote after joining canonical was to render my version of burndown charts. If I am not mistaken this code is still in use. In any case, status.ubuntu.com is critical to maintaining our planning, and ensuring that the status of the project is visible to all.

Unity 8 in 13.10

While 13.10 is very very focused on Ubunty Touch for phones, we all know that the real prize is the fully converged client OS. With that in mind, I think it's important to get the code up on as many device types as possible as soon as possible. There was a rich discussion about the steps to offer Unity 8 on top of Mir as an option in 13.10. Now, keep in mind that the result will only be the Phone UI on the desktop, and the default will be the Unity that we know and love today (with Smart Scopes and other enhancements of course!). Still in all, I am betting that basing Unity 8 on QML means that it will be surprisingly functional on a desktop even though it won't have any real desktop support in terms of things like workspace switching, etc..

Monday, May 13, 2013

A little bit of reusable code Sound Button

Want a button for Ubuntu Components that plays a sound when pressed, and stops when released? Here's SoundButton . Perfect for your typical Sound Board type app.


import QtQuick 2.0
import Ubuntu.Components 0.1
import QtMultimedia 5.0

    Button
    {
        id: soundButton
        property string soundUrl: ""
        onPressedChanged:
        {
            if(pressed)
            {
                audio.play()
            }
            else
            {
                audio.stop()
            }
        }

    Audio
    {
        id: audio
        source:soundButton.soundUrl;
    }
}


Wednesday, May 8, 2013

Woof woof!


Last week I fell into a discussion with Mark, Pat, and others about the importance of being able to really use a piece of software to really know how far there is between where you are, and a shippable state. Of everything that is missing, it's hard to know what is really the most important unless you can really use it and find what you have to work around, versus what you can just do without.

Out of this conversation was born the idea that we should drive as hard as we can to making it so that we can use our phones with Ubuntu Touch as our real daily phones as soon as possible. Really eat our own dogfood, so to speak. woof!

So, we committed our teams to making it so that by end of May, the phone images will be usable as our daily phones, defined as the following:

  • You can make and receive phone calls
  • You can make and receive sms messages
  • You can browse the web on 3g data
  • You can browse the web on wifi
  • You can switch between wifi and 3g data
  • The proximity sensore dims the screen when you lift the phone to talk on it
  • You can import contacts from somewhere, and you can add and edit contacts
  • When you update your phone your user data is retained, even if updating with phablet-flash

We believe that at least some of us will be able to really dogfood if we accomplish that. Of course, there will be a lot missing. Off the bat, I can thinking of things like the ability to find and install new apps, hardware not working on certain reference hardware (camera on Nexus 7 for example?), lots of missing features in existing apps, etc... However, in my experience, progress accelerates when people are using, in addition to building, software.

Tuesday, May 7, 2013

Ugly Duckling to Beautiful Swan, or How an App Developer Benefits from Designer/Developer Collaboration


Last week I snatched an hour here and there to work on my Feedzilla app. I like Feedzilla because it has an api that is free for me to use, so it's easy to write the app. However, I'm not totally enamored with the content, it seems like it is often out of date, though I suppose I can apply a filter to limit the content to new stuff from this week, or whatever.

However, what really stopped me working on it was that my implementation was just depressingly ugly. I'd look at all the cool and beautiful things that other people were doing with their apps, and be totally unmotivated to work on TechNews. Last week, I decided to ask for some help in how to improve my app, and I was told about ListItems. For TechNews, it was like the sun coming out from behind the clouds.

Now, the thing abut Ubuntu.Components is that the project is fundamentally a design project. Yes, the components need, and have, an awesome development team that makes them "real", but the components are really about providing developers with the tools for making a well designed "Ubuntu App". This couldn't be more clear than when using ListItems.

For an example, to turn the categories list from this:
My very ugly list which was my honest best effort without design help.

to this:
My now lovely list that I got to be that way just by using the right components and inheriting all of the designers' knowledge and talents.

I just had to use Standard list items. First, I went ahead and imported the ListItem namespace:
import Ubuntu.Components.ListItems 0.1

Then this is what my delegate for each list item looks like. The "progression: true" declares that the item will navigate somewhere. The designers ensured that this means the list item adds that ">", so it is standard navigation in all apps!
    delegate: Standard
    {
        progression: true;
        text: articlesListView.model[index]["title"]

        onClicked:
        {
            articleSelected(articlesListView.model[index]["url"])
        }
     }

So my app went from ugly duckling to beautiful swan just by using the right components and getting all the benefit of the designers' abilities that I so sorely lack. Thanks SDK team!

Monday, April 15, 2013

FingerPaint, my 20 minute app

Here's a quick demo of using InkCanvas.

First I create a rectangle to fill the window to make everything white. Then I made an InkCanvas and set the InkWidth to something like a kid would finger paint:
        InkCanvas
        {
            id: inkCanvas
            width:parent.width
            height:parent.height - paintPotSize
            inkWidth: 30
        }


So, now that I have an InkCanvas component, the inking is the easy part. I spent most of the 20 minutes working on the paint color selector.

Those blocks along the bottom are MouseAreas filled with UbuntuShapes. So I just respond to the clicked signal and set the InkCanvas's inkColor property ...

Using a Repeater, I can set them up like this:
        Row
        {
            width: parent.width
            height: paintPotSize
            Repeater
            {
                model: [Qt.rgba(1,0,0,.5), Qt.rgba(0,1,0,.5), Qt.rgba(0,0,1,.5),
                        Qt.rgba(1,1,0,.5), Qt.rgba(1,0,1,.5), Qt.rgba(0,1,1,.5)]
                MouseArea
                 {
                    height: paintPotSize
                    width: paintPotSize
                    onClicked: {inkCanvas.inkColor = modelData}
                    UbuntuShape
                    {
                        anchors.fill: parent
                        color: modelData
                    }
                }
            }
        }

Tada ... a finger paint program suitable for kids to get their grubby mits all over your device in 20 minutes :)

Code is here

Introducing InkCanvas

So, I drew a beard on Tard today!  Furthermore, I did it with just a few lines of QML. Here's the whole program for drawing on Tard ...

MainView {
    // objectName for functional testing purposes (autopilot-qt5)
    objectName: "mainView"
    applicationName: "InkArea"
    
    width: units.gu(100)
    height: units.gu(75)


    Image
    {
        source: "grumpycat.jpg"
        anchors.fill: parent;
        fillMode: Image.PreserveAspectFit
    }

    InkCanvas
    {
        anchors.fill: parent
        inkColor: Qt.rgba(0, 0, 0)
        inkWidth: 15
    }
}

I just added an InkCanvas to my MainView and covered the Image with it. Simple, right? Well, you may have guessed there is slightly more to it than that. Where did InkCanvas come from? InkCanvas is a custom component that I wrote in pure QML to allow users to draw an a surface.

You may be aware of my long interest in free from editing applications. Remember Photobomb?
So, I decided to try my hand at collecting Ink in QML. There was some surprising complexity in getting it to work and work quickly, and it is still very much a work in progress. None the less, I want to invite people to:

  • Download and use InkCanvas in their apps if they want. I hope it unlocks some fun things for people to do.
  • Contribute to making InkCanvas better. Extend it, fix it, break it, etc...

Note that it currently doesn't work perfectly on my Nexus7. Something seems to break the canvas when Ink starts getting drawn :(
I logged a bug about this, but for all I know, it has something to do with the way I am abusing the Canvas and Stroke Components. Though it does work fine on my desktop.

Easy Task Navigation With PageStack (Fixed)


Thanks to an update to the documentation for Ubuntu Components, I discovered that I was using PageStack all wrong. I've gone ahead and deleted my old blog post about PageStack, and now here is a corrected one.

My Feedzilla app has a very simply page by page structure. Each bit of UI that the user interacts with is a wholly separate task so can take over the whole screen to present to the user.

Turns out, that Ubuntu Components have a component to support this in a standard, and very convenient, manner. It's called PageStack.

Here's how it works.

First, I created a PageStack component, and named it "rootStack". The categories view is always the starting point of the app, so I made it a Page inside the PageStack, and named it "rootPage". Then I added SubCategoriesPage (which is a ListView that shows the list of Technology sub-categories from Feedzilla:

It looks like this.
    PageStack
    {
        id: rootStack
        Page
        {
            title: "Categories"
            id: rootPage
            SubCategoriesComponent
            {
                id: subCategoriesComponent
                anchors.fill: parent
            }
        }
    }

Now, even though rootPage is visible, it's not actually on the PageStack yet. PageStack is a "stack" in the programming sense. That means you can push items on top of the stack, and pop items off. So I need to write some code to push rootPage onto the PageStack. I do this by adding an onCompleted handler to the PageStack and pushing the rootPage onto the PageStack there.

    PageStack
    {
        id: rootStack
        Page
        {
            title: "Categories"
            id: rootPage
            SubCategoriesComponent
            {
                id: subCategoriesComponent
                anchors.fill: parent
            }
        }
      Component.onCompleted:
      {
            push(rootPage)
      }
   }

So, how does the user navigate? I added a signal to SubCategoriesComponent for when the user has selected a category.

I made two other Components. One for displaying a list of articles and one for displaying articles themselves. I host these components inside of pages. I also set the pages to be invisible.


    Page
    {
       visible: false
       id: articlesListPage;
       ArticlesListComponent
        {
            id: articlesList
            anchors.fill: parent;
            onArticleSelected:
            {
                articleComponent.url = url
                rootStack.push(articlePage)
            }
            onTitleChanged:
            {
                articlesListPage.title = articlesList.title
            }
        }
      }
      Page
      {
        visible: false
        id: articlePage
        ArticleComponent {
            id: articleComponent
            anchors.fill: parent;
        }
      }

When the user selects a category, they need to see a list of articles. I made ArticlesListComponent todo that job. When they select a specific article, the user should see the article, I created ArticleComponent for that. Note:

So, getting back to the story, how do we push these onto the PageStack?

        Page
        {
            title: "Categories"
            id: rootPage
            SubCategoriesComponent
            {
                id: subCategoriesComponent
                anchors.fill: parent
                onSubCategorySelected:
                {
                    articlesList.subCategoryId = subCategoryId;
                    rootStack.push(articlesListPage)
                }
            }
        }

You may recall that I added a onSubCategorySelected signal to my SubCategoriesComponent component. All I have to do is respond to that signal. First I configure my ArticlesListPage to use the sunCategoryId passed into the signal handler. Then I tell the PageStack to push articlesListPage (the instance of ArticlesListPage declared in the QML above). Pushing 'pushes' pushes the component on top of the categories list.

I use similar code to push the ArticlesComponent when the user selects an article.
            onArticleSelected:
            {
                articleComponent.url = url
                rootStack.push(articlePage)
            }

The ArticleComponent can only be on top, so it doesn't push anything.

But what about going back? That's where popping comes in. I added an action to rootPage which simply tells rootStack to pop. Pop is opposite of push. Instead of adding something to the top of the stack, it takes whatever is on top off. It pops off the top. rootPage can't be popped off, though, because it is at the root. This makes the code easy. If I wanted to, I could handle popping myself with code like this:
            tools: ToolbarActions
            {
                Action
                {
                    id: backAction
                    text: "Back"
                    iconSource: "back.png"
                    onTriggered:
                    {
                        rootStack.pop();
                    }
                }
            }
     

However, this is not necessary because PageStack automatically creates and maintains a back button for me!

I pushed a branch with my corrected code.

Tuesday, April 2, 2013

ListView with JSON model (and the world's ugliest application)


First, I want to extend my deepest apologies for how ugly this app is at the moment. It's embarrassing. Sorry. I will put lipstick on it later, I hope.

This app is for browsing technical news from Feedzilla. It has 3 pages, A page for categories (well, subcategories because Tech is itself a category in Feedzill), a list of articles, and WebView to display an article.
Main Category View

Article List View

Reading an Article in Embedded Webkit

However, I did want to blog about part of how I built it, because I think it is generally useful for folks to see how I made my ListViews from JSON.

I blogged before about how I used an XmlListModel to make a ListView, and how easy that was. However, for this App, I wanted to use a JSON feed from feedzilla. However, there is no JsonListView. So what did I do? Here's how I made the main category view.

To get started, I created a ListView, as usual:
    ListView
    {
        id: categoriesList
        anchors.fill: parent;
    }

It doesn't do anything yet, because there is no model set. Remember, a ListView's only purpose in life is to display data in a list format. The data that I want is available in JSON format, so, next I need to get the JSON and set the model of the ListView.

So, in onComplete method, I wrote some good old fashioned Ajaxy javascript.
    Component.onCompleted:
    {
        //create a request and tell it where the json that I want is
        var req = new XMLHttpRequest();
        var location = "http://api.feedzilla.com/v1/categories/30/subcategories.json"

        //tell the request to go ahead and get the json
        req.open("GET", location, true);
        req.send(null);

        //wait until the readyState is 4, which means the json is ready
        req.onreadystatechange = function()
        {
            if (req.readyState == 4)
            {
                //turn the text in a javascript object while setting the ListView's model to it
                categoriesList.model = JSON.parse(req.responseText)
            }
        };
    }

The key line is the one that sets the ListView's model to a javascript object:
categoriesList.model = JSON.parse(req.responseText)

This works because all of the javascript that is returned is a list. So, I fetched a list in Javascript Object Notation, parsed it, and used it as a model for a ListView. Easy, right?

So now that the ListView has a model, I can create a delegate. Remember, a delegate is a bit of code, like an anonymous method, that gets called for each element in the ListViews model, and creates a component for it. Whenever the model for the ListView changes, the delegate is called for each item in the model. Every time the delegate is called, it gets passed "index" which is the index of the current item being created. So the delegate uses that to get the correct element from the list of javascript objects.

    ListView
    {
        id: categoriesList
        anchors.fill: parent;
        delegate: Button
        {
            width: parent.width
            text: categoriesList.model[index]["display_subcategory_name"];
            onClicked:
            {
                subCategorySelected(categoriesList.model[index]["subcategory_id"])
            }
        }
    }

My ListView is just a row of buttons, and the text is defined as "display_subcategory_name" in the JSON that I got from the server. So I can index in and set the text like so:
            text: categoriesList.model[index]["display_subcategory_name"];

Bonus snippet! The code that I wrote is a component that gets used in a PageStack. I don't want the PageStack to have to know about how the category list is implemented, of course, so I want my component to emit a signal when when of the categories is selected by the user (which is by clicking a button in this implementation).

Adding signals to a component is really easy in QML. First, you declare the signal where you declare properties and such for your component:
    signal subCategorySelected(int subCategoryId);

In this case, the signal has a single parameter. A signal can as many parameters as you want.

Then, the onClicked function for each button "fires" the signal by calling it like a function:
                subCategorySelected(categoriesList.model[index]["subcategory_id"])

That means my PageStack can just listen for that signal:

                onSubCategorySelected:
                {
                    //do stuff with subCategoryId
                }
That's all you have to know to simplify your code with custom signals!

Thursday, March 28, 2013

User Interaction with Ubuntu Components


I am so very able to amuse myself with all these funny pictures, but there are other amusing subreddits other than funny. So today I added the ability to choose a different subreddit. This involved diving into the world of Ubuntu Components.

Ubuntu Components were surprisingly functional, but as you will see, they are still a work in progress.

So, the first thing I needed to do was to make a way for the user to say that they want to change subreddits. Ubuntu Touch provides the bottom edge for your application to add a list of commands. This is a nice way to do it because it means that the screen isn't cluttered with commands, but users know exactly where to go when they want them.

The first thing to do is to ensure that the top level of your app is a MainView, and then you are presenting the content in a Page. So, roughly your apps structure looks like ...

//imports
MainView
{
    //set MainView properties
    Page
    {
        //app UI content
    }
    //components outside pages
}

I wanted to add a "subreddit" button. To do that, I set the tools property of the page to a list of actions. So far there is only one action. Essentially, I am defining a button. I tell it the text I want, the icon to use (I downloaded an icon that I wanted) and the action to take. So this goes inside the Page tag:

        tools: ToolbarActions
        {
        Action
        {
            text: "SubReddit"
            iconSource: Qt.resolvedUrl("reddit.png")
            onTriggered: PopupUtils.open(subRedditSheet)
        }
    }
Now you can see that if swipe from the button, I get my button.
But what is that action? What I did was create a ComposerSheet that allows the user to input the reddit that they want. You do this by defining a Component that wraps a ComposerSheet. A ComponentSheet is kind of like a dialog box. It handles putting Ok and Cancel buttons on for you. Note that you have to name the ComposerSheet "sheet", or you get errors. All I added was a TextField that I called "subRedditText, but you can fill the ComposerSheet with whatever you want.

I just have to tell it what to do when the user clicks Ok. I did a little refactoring from yesterday to create a "changeSubReddit function that gets called on start up, and can get called from here. I just pass it the subreddit. (Don't forget to import Ubuntu.Components.Popups 0.1 in order to use the ComposerSheet).

Then you call PopupUtils.open to pop it open when you want it (which I specify as the action for my reddit button in the ActionList).

    Component
    {
        id: subRedditSheet

        ComposerSheet {
            id: sheet;
            title: "Choose SubReddit"
            TextField
            {
                id: subRedditText
            }

            onCancelClicked: PopupUtils.close(sheet)
            onConfirmClicked:
            {
                changeSubReddit(subRedditText.text)
                PopupUtils.close(sheet)
            }
        }
    }


As you can see, the ComposerSheet doesn't have size logic yet (or as likely I did something wrong), but none the less, it works!

I got a surprising amount of free functionality from using Page, ToolbarActions, and ComposerSheet. On top of being easy and fun, it means that my app will inherit the look and feel, interaction patterns, translations and Ubuntu Touch style guidelines!


Time Waster Turbo Charge


After my post yesterday about browsing 9gag.com, I decided I should make an even more efficient time waster. Way back in the day, I made an app called "lolz". But a lot has changed since then. Including the emergence of Imgur. Imgur is a service that hosts images for Reddit. And Reddit is the world's most efficient time waster.

Also, Imgur has a nice API, so access to the data seemed pretty easy. Thus, I bring you, the greatest time wasting app of ever.

Here's how I got started.

QML often uses a Model-View-Controller architecture built in. I found that I can take advantage of this by for my app because. Specifically, the imgur app optionally serves up XML. If you have the option to get XML, use it! It makes things go much faster.

So, the heart of the app as it exists today is my XmlListModel. An XmlListModel essentially turns XML into a list of objects or key/value pairs that other QML components can use. So, I made a model like this:

    XmlListModel
    {
        id: imagesXML;
        query: "/data/item";
        XmlRole
        {
            name: "imgURL";
            query: "link/string()";
        }
    }

There are 2 parts, the first is the "query". This tells the model what types in the XML to look for. The picture from Imgur are "items" so I tell the model to look inside data tags for item tags.

The second part is a set of XmlRoles. XmlRoles convert the info in the Xml tags into key value pairs for other components to consume. So, I tell it to make a key called "imgURL" that is paired with value of whatever string is stored in the "link" tag. In the imgur API, "link" is a url that goes directly to the image.

But where does the XML come from? Typically, you would use the source property to point the XmlListModel to a url with xml. But this won't work with the imgur API because you need to set a header in the http request that includes your client idea for the API. Well, at least I couldn't figure out how to tell the XmlListModel to set a value in the header.

However, I didn't fret. Instead I used good old javascript XMLHttpRequest to get the XML, and then to set the xml property for the list model. So I made an init() function that runs when the app is ready.

    function init()
    {
        var req = new XMLHttpRequest();
        var location = "https://api.imgur.com/3/gallery/r/funny/time/1.xml";
        req.open("GET", location, true);
        req.setRequestHeader('Authorization', 'Client-ID xxxxxxxx');
        req.send(null);
        req.onreadystatechange = function()
        {
            if (req.readyState == 4)
            {
                imagesXML.xml = req.responseText;
                activityIndicator.running = false;
                activityIndicator.visible = false;
                imagesView.visible = true;
            }
        };

This function makes a request, and when it gets a response it sets the XmlListModel's xml property to the responseText. Again, this is very classic AJAXy programming. Then I do a few lines of setting the UI. You may notice that this includes making the imagesView visible. imagesView is the list view that I created to be the view for the model.

        ListView
        {
            visible: false;
            id: imagesView;
            model: imagesXML;

            orientation: Qt.Horizontal;
            anchors.fill: parent;
            delegate: MouseArea
            {
                height: parent.height;
                width: root.width;

                Image
                {
                    width: root.width;
                    height: parent.height;
                    fillMode: Image.PreserveAspectFit;
                    source: imgURL;
                }

                onClicked:
                {
                    if(children[0].fillMode == Image.Pad)
                    {
                        children[0].fillMode = Image.PreserveAspectFit;
                    }
                    else
                    {
                     children[0].fillMode = Image.Pad;
                    }
                }
            }
        }

A ListView has 2 key parts. The first part specifies the model for the view using the model property. Easy enough.

The second part is the "delegate". A delegate is the component that you create for each entry in the model. As you can see, I chose to make a MouseArea for each imgurURL. The MouseArea, in turn, contains an Image for displaying the image. The MouseArea is set up so I can do some interactions with the Image as desired. Currently, a tap toggles the Image between resizing to fit the size of the Image and displaying the Image at it's normal size.

The great thing about the ListView is that it is a Flickable. So I get the nice flicking behavior of scrolling the list left and right for free! The ListView does other key things, especially, loading the images on demand. It only loads the images when they are scrolled into view. This saves a lot of network and memory resources.

So, for the next features, I think I shall allow the user to choose a subreddit to browse.

Wednesday, March 27, 2013

Time Killer Extrordinaire

Every morning I update to the new Ubuntu Touch Image [change log] on my Nexus 7. Then at lunch, I  "use" it to check Facebook and read funny posts. Lunch time time killing use case nailed.

Tuesday, March 19, 2013

Sweet Ubuntu Device QtCreator Integration

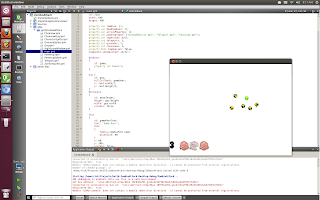
I spent a bit of today using the Ubuntu Device integration features in Qt. It's fresh software, but it's really easy and fun. Here is the development version of the game I am running running on my desktop. Noticed that I set the size of the window and therefore the play area very intentionally. But, I had to think to myself "will the touch interactions work ok on my tablet?" "What about the sizes?". Fortunately, getting it onto my tablet is pretty easy.

There is a device button in the left hand channel of QtCreator. I connected my Nexus 7 to my desktop via USB. Clicked Detect Devices, and there it is! Look at the many buttons that will make managing my device easier. For example, I am looking forward to trying the Upgrade to Daily Image button tomorrow. 

So, how do I run it on my Nexus 7? I just use the command to do so! Notice there are other cool commands there too to try later. 
After picking "Run on Device" my app showed up on my tablet. As you can see from the screenshot, it had some issues! However, the touch screen worked the way I was hoping. Obviously, I need to think more about sizing and containment to make it all work correctly. Fortunately, it will be very easy to test it all.

Of course, I wanted a screenshot for this post. But how would I get that? With the Tools -> Ubuntu -> Device menu, of course! This menu has some other useful functions for managing the device. For example, the apt-get menu will allow me to install dependencies for my app.
All in all, I'm really pleased with the Ubuntu Device integration. It seems like will help make app development for my tablet and phone easy and fun.

Extract Class Refactor Built in QtCreator

Following up from my post about how I think about inheritance yesterday, I thought I'd do a quick post about a refactoring feature built into the QtCreator editor.

In this example, I decided I wanted to add a box that lets the user enter a name for a high score if they achieved it, and then to display all the high scores. I got started by creating an UbuntuShape with a column and sub components in main.qml, but quickly realized that I will have a lot of behavior and presentation to manage. This would be much easier to develop in it's own component (or "class" as I think of it).

So, I just right clicked in the editor and used the refactoring menu to "Move Component into Separate File." 
I got a dialog that asked for a name, I chose "HighScoreBox" and it created a new file for me, and replaced all of my QML code in main.qml with just the little bit of code needed to declare the object.

Now I am ready to properly develop the behavior for the component. Like any good refactoring tool, the code kept working. 


Monday, March 18, 2013

How I Learned to Love QML and Inheritance Therein

Gotta love the "developer art" ... those placeholder images should be replaced by sweet Zombie artwork as the game nears completion.
For a long time I resisted the QML wave. I had good reasons for doing so at the time. Essentially, compared to Python, there was not much desktop functionality that you could access without writing C++ code to wrap existing libraries and expose them to QML. I liked the idea of writing apps in javascript, but I really did not relish going back to writing C++ code. It seemed like a significant regression. C++ brings a weird set of bugs around memory management and rogue pointers. While manageable  this type of coding is just not fun and easy.

However, things change, and so did QML. Now, I am convinced and am diving into QML.
  • The base QML libraries have pretty much everything I need to write the kinds of apps that I want to write.
  • The QtCreator IDE is "just right". It has an editor with syntax highlighting and an integrated debugger (90% of what people are looking for when they ask for an IDE) and it has an integrated build/run system.
  • There are some nice re-factoring features thrown in, that make it easier to be pragmatic about good design as you are coding. I also like the automatic formatting features.
  • The QML Documentation is not quite complete, but it is systematic. I am looking forward to more samples, though, that's for sure.

In my first few experiences with QML, I was a tiny bit thrown by the "declarative" nature of QML. However, after a while, I found that my normal Object Oriented thought processes transferred quite well. The rest of this post is about how I think about coding up classes and objects in QML.

In Python, C++, and most other languages that support OO, classes inherit from other classes. JavaScript is a bit different, objects inherit from objects. While QML is really more like javascript in this way, it's easy for me to think about creating classes instead.

I will use some code from a game that I am writing as an easy example. I have written games in Python using pygame, and it turned out that a lot of the structure of those programs worked well in QML. For example, having a base class to manage essential sprite behavior, then a sub class for the "guy" that the player controls, and various subclasses for enemies and powerups.

For me, what I call a QML "baseclass" (which is just a component, like everything else in QML) has the following parts:
  1. A section of Imports - This is a typical list of libraries that you want to use in yor code. 
  2. A definition of it's "isa"/superclass/containing component - Every class is really a component, and a compnent is defined by declaring it, and nesting all of it's data and behaviors in curly brackets.
  3. Paramaterizable properties - QML does not have contructors. If you want to paraterize an object (that is configure it at run time) you do this by setting properties.
  4. Internal compotents - These are essentially private properties used within the component.
  5. Methods - These are methods that are used within the component, but are also callable from outside the component. Javascript does, actually, have syntax for supporting private methods, but I'll gloss over that for now.
In my CharacterSprite baseclass his looks like:

Imports

 import QtQuick 2.0  
 import QtQuick.Particles 2.0  
 import QtMultimedia 5.0  

Rectangle is a primative type in QML. It manages presentation on the QML surface. All the code except the imports exists within the curly braces for Rectangle.

Paramaterizable Properties

   property int currentSprite: 0;  
   property int moveDistance: 10  
   property string spritePrefix: "";  
   property string dieSoundSource: "";  
   property string explodeParticleSource: "";  
   property bool dead: false;  
   property var killCallBack: null;

Internal Components

For readability, I removed the specifics.
   Repeater  
   {  
   }  
   Audio  
   {  
   }  
   ParticleSystem  
   {  
     ImageParticle  
     {  
     }  
     Emitter  
     {  
     }  
   }  

Methods

With implementation removed for readability.
   function init()   
   {   
    //do some default behavior at start up   
   }   
   function takeTurn(target)   
   {   
    //move toward the target   
   }   
   function kill()   
   {   
    //hide self   
    //do explosion effect   
    //run a callback if it has been set   
   }   

Now I can make a zombie component by creating a new file called ZombeSprite.qml and simply set some properties (and add some behavior as desired). Note that I declare this component to be a CharacterSprite instead of a Rectangle as in the CharacterSprite base class. For me, that is the essence of defining inheritance in QML.

 CharacterSprite  
 {  
   spritePrefix: "";  
   dieSoundSource: "zombiedie.wav"  
   explodeParticleSource: "droplet.png"  
   Behavior on x { SmoothedAnimation{ velocity:20}}  
   Behavior on y { SmoothedAnimation{ velocity:20}}  
   height: 20  
   width: 20  
 }  

I can similarly make a GuySprite for the sprite that the player controls. Note that
I added a  function to Guy.qml becaues the guy can teleport, but other sprites can't.
I can call the kill() function in the collideWithZombie() function because it was inherited from the CharacterSprite baseclass. I could choose to override kill() instead by simply redefining it here.
 CharacterSprite   
  {   
   id: guy   
   Behavior on x { id: xbehavoir; SmoothedAnimation{ velocity:30}}   
   Behavior on y { id: ybehavoir; SmoothedAnimation{ velocity:30}}   
   spritePrefix: "guy";   
   dieSoundSource: "zombiedie.wav"   
   explodeParticleSource: "droplet.png"   
   moveDistance: 15   
   height: 20;   
   width: 20;   
   function teleportTo(x,y)   
   {   
    xbehavoir.enabled = false;   
    ybehavoir.enabled = false;   
    guy.visible = false;   
    guy.x = x;   
    guy.y = y;   
    xbehavoir.enabled = true;   
    ybehavoir.enabled = true;   
    guy.visible = true;   
   }   
   function collideWithZombie()   
   {   
    kill();   
   }   
  }  

So now I can set up the guy easily in the main qml scene just by setting connecting up some top level properties:
   Guy {  
     id: guy;  
     killCallBack: gameOver;  
     x: root.width/2;  
     y: root.height/2;  
   }